Connecting the micro:bit to a Computer with MakeCode#
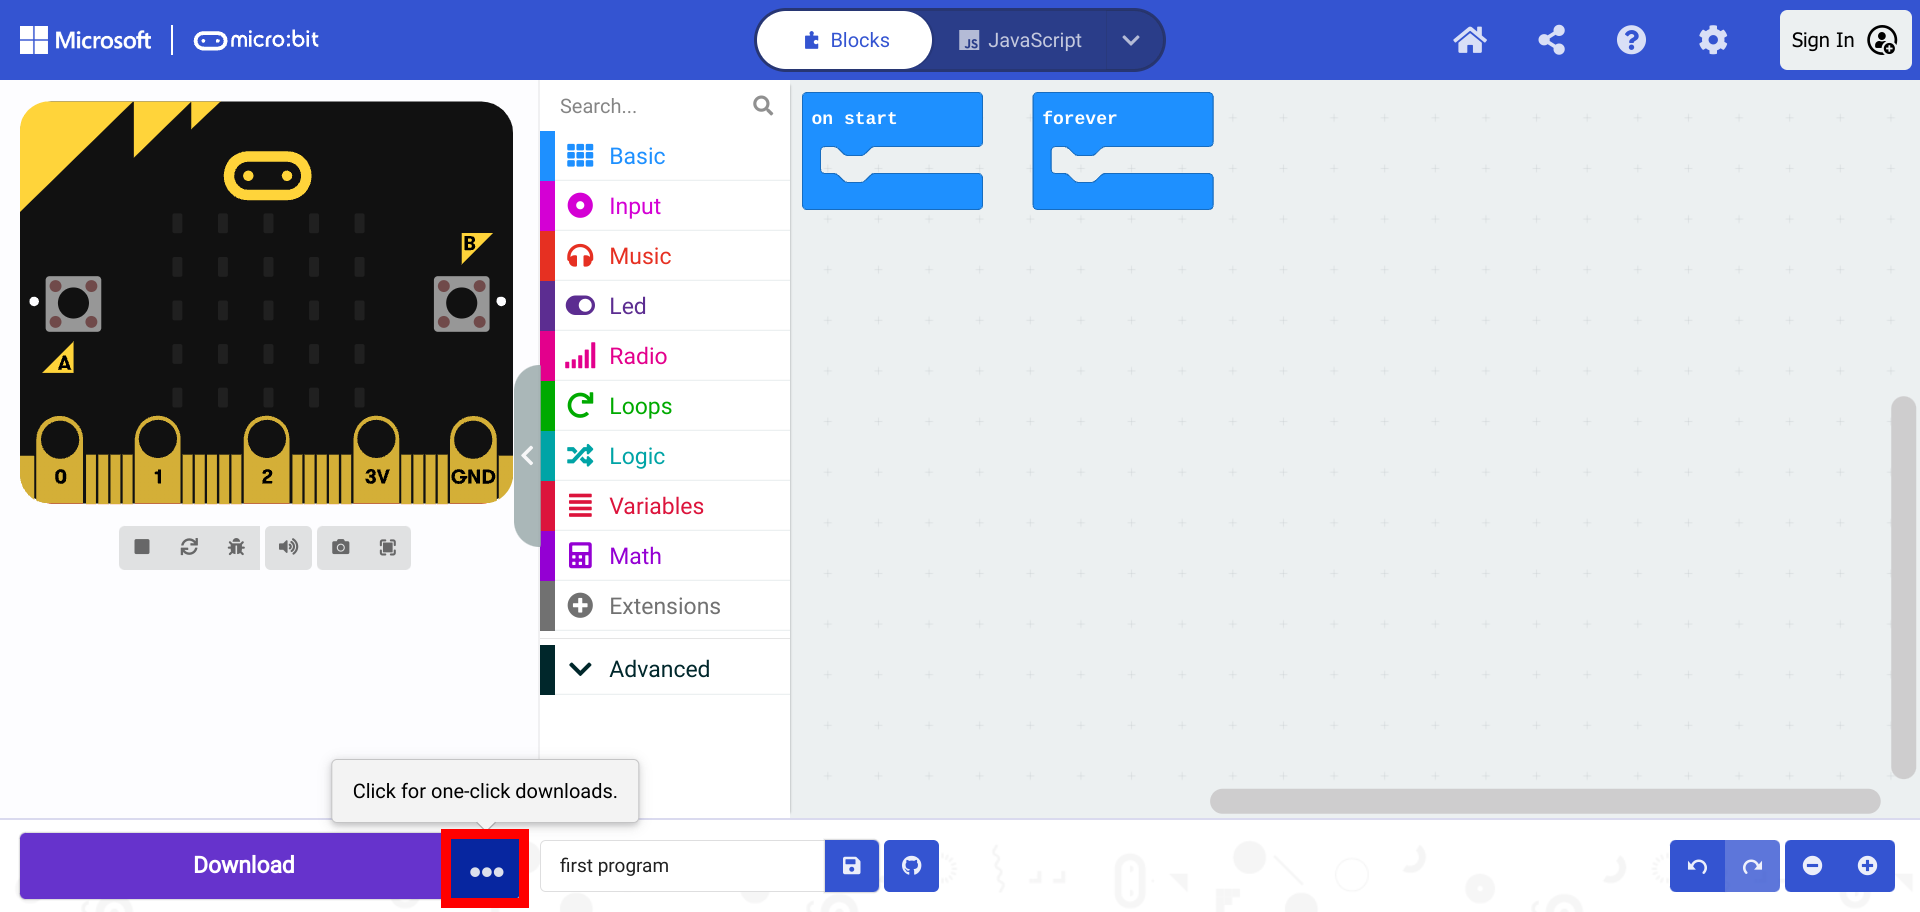
Click on the button with three dots to start connecting the micro:bit.
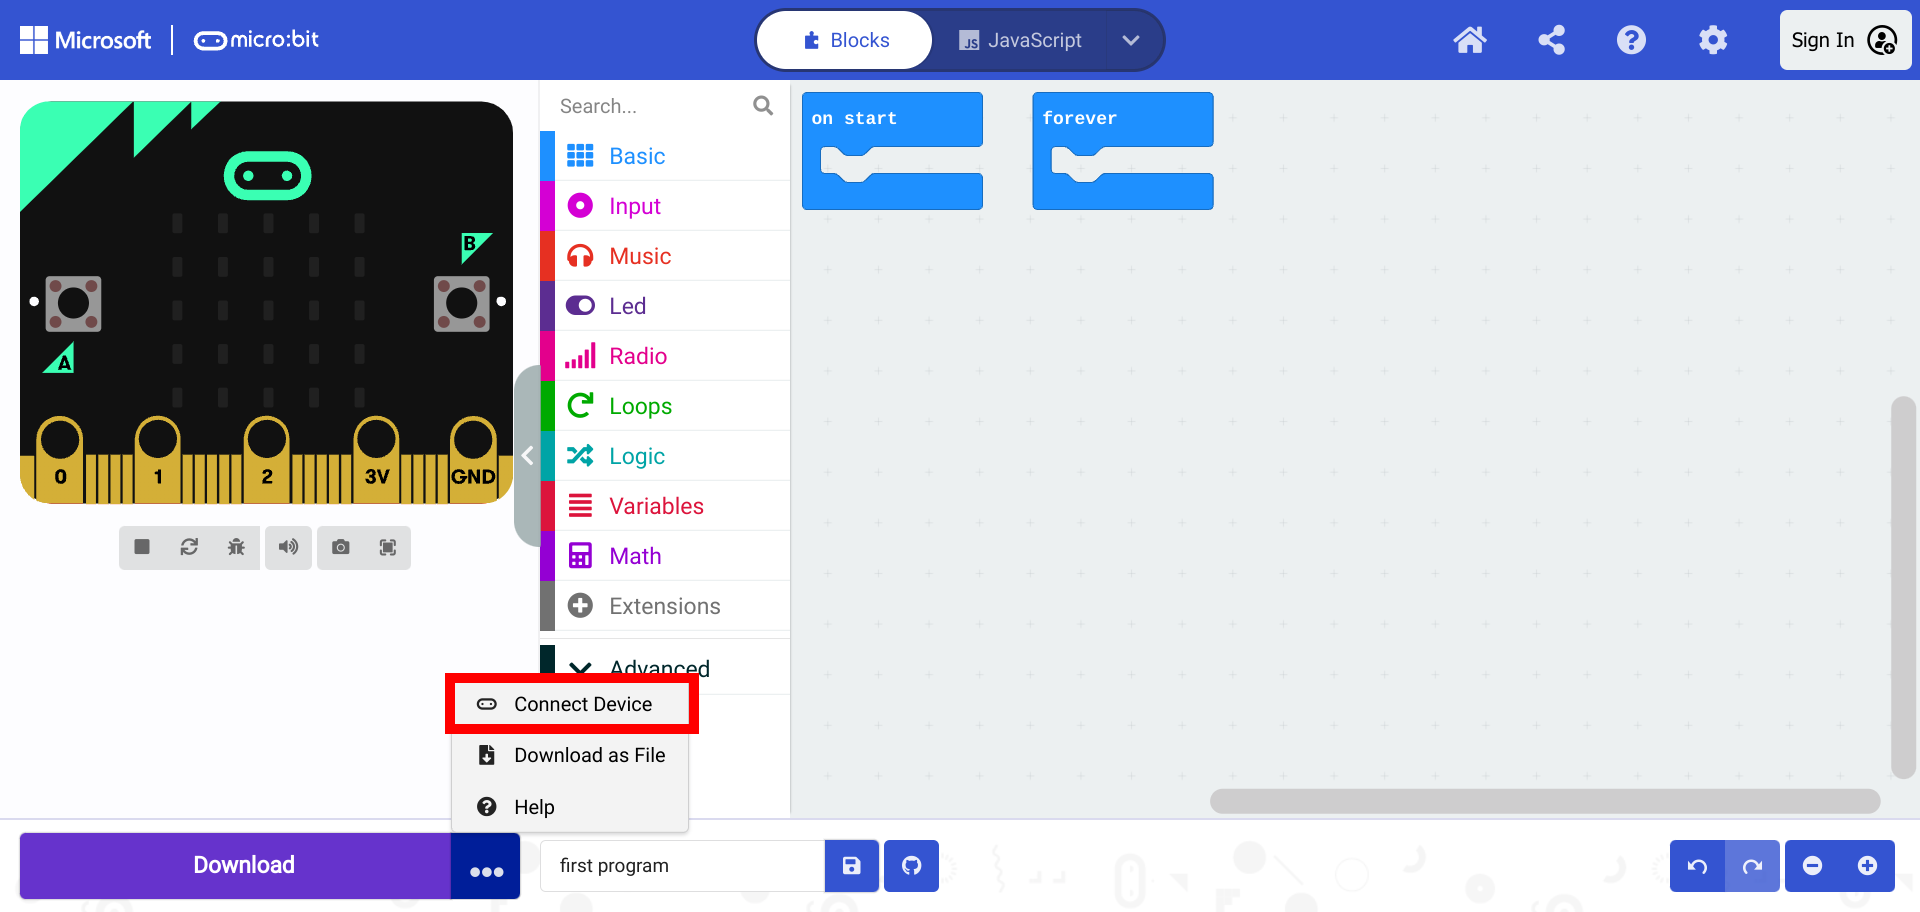
Select “Connect Device”.
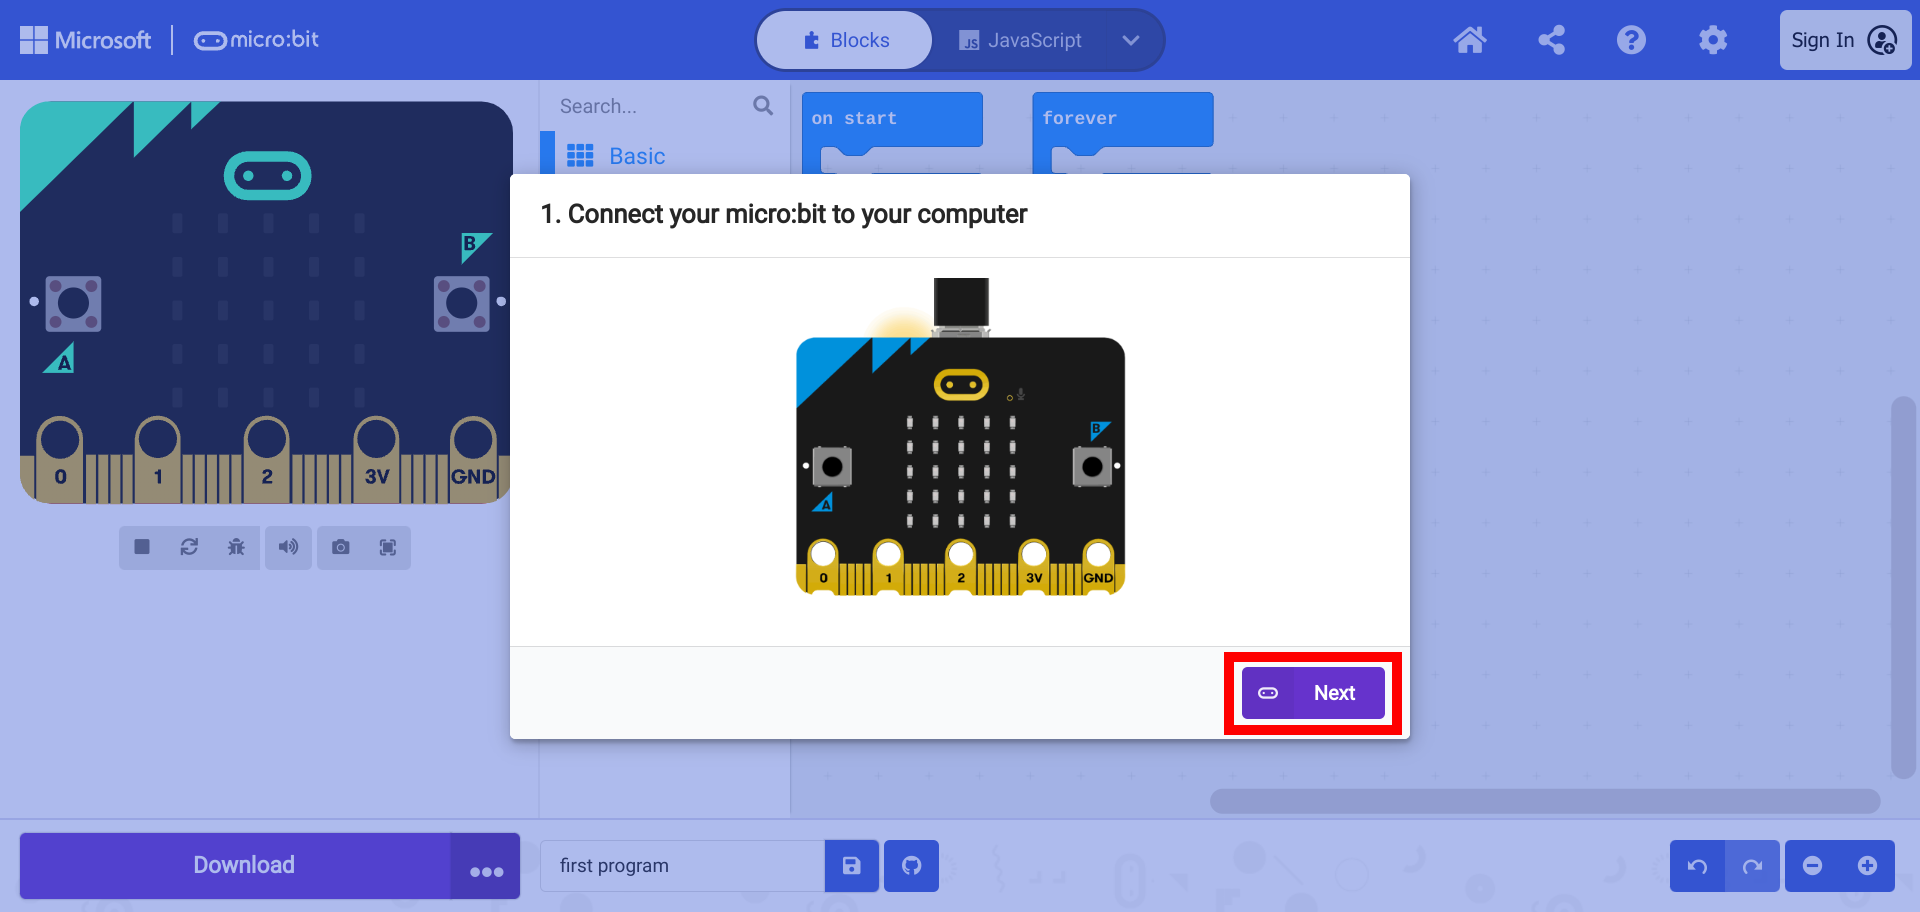
A window will appear with a prompt to connect the micro:bit. Connect the micro:bit using a micro-USB cable with the proper connection for the computer. And select “Next”.
Another window appears with a prompt to pair the micro:bit with the computer. Select “Pair”.
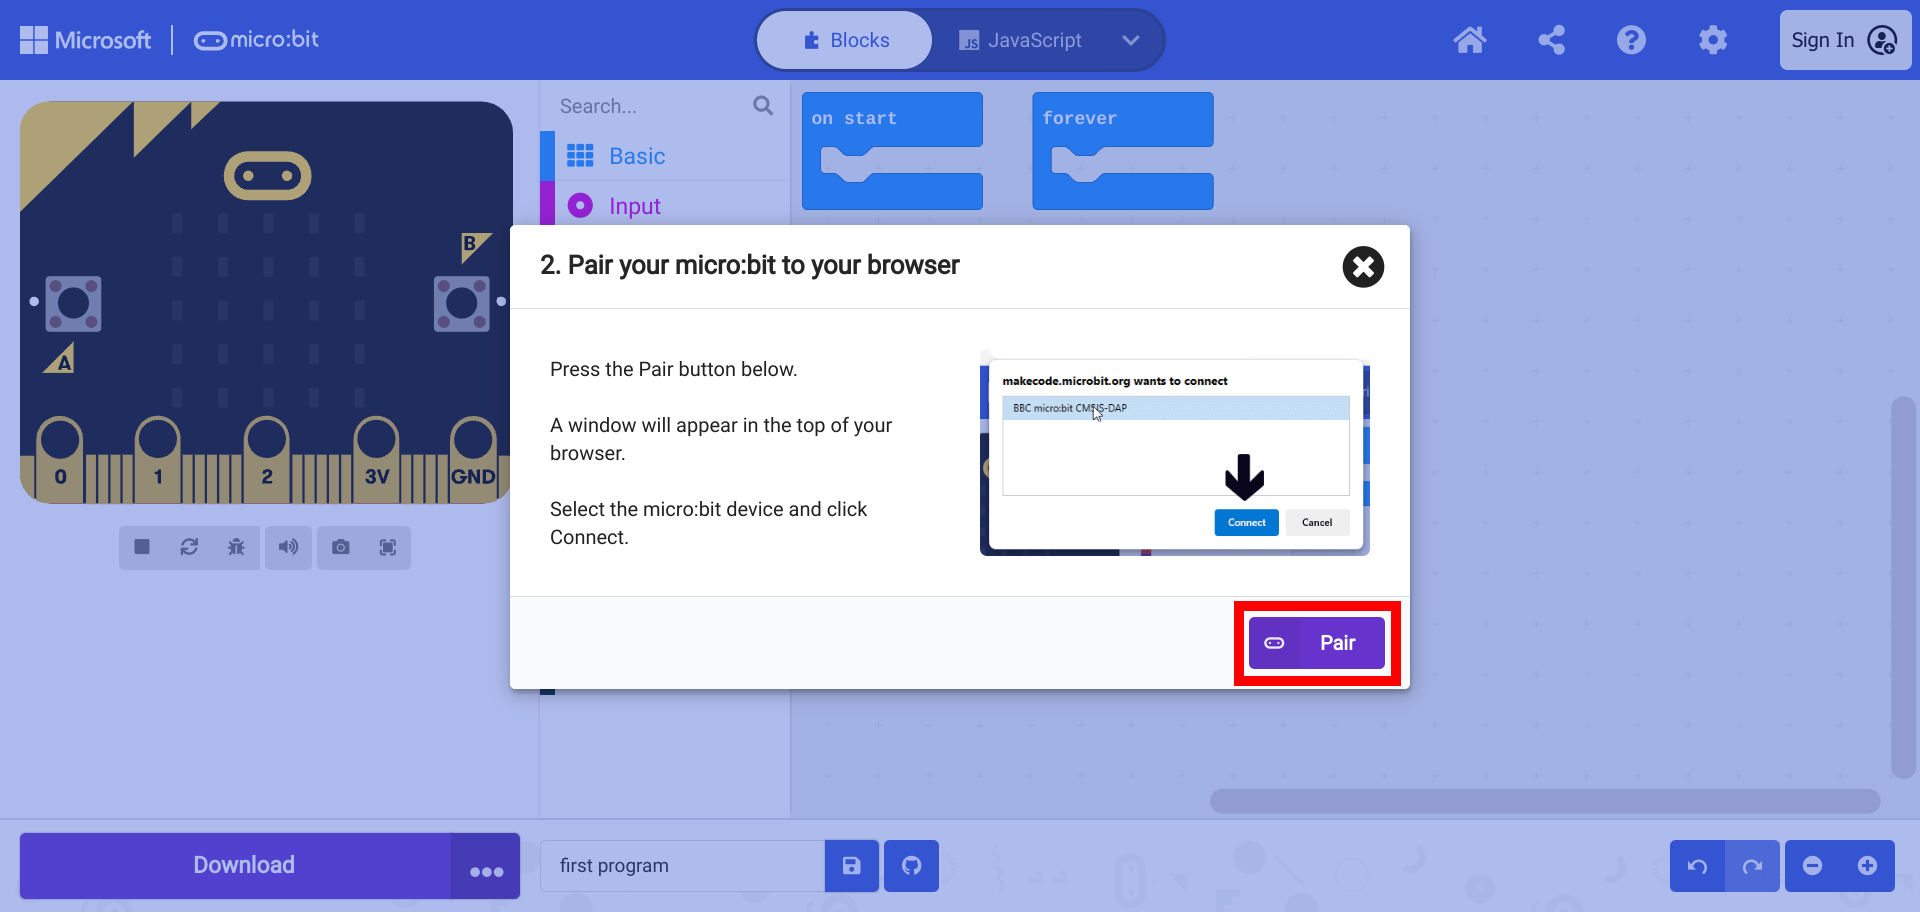
A window appears with a list of devices.
Warning
Attaching more than one micro:bit to the computer can cause complicate this process. Only one device should be connected and listed in the window.
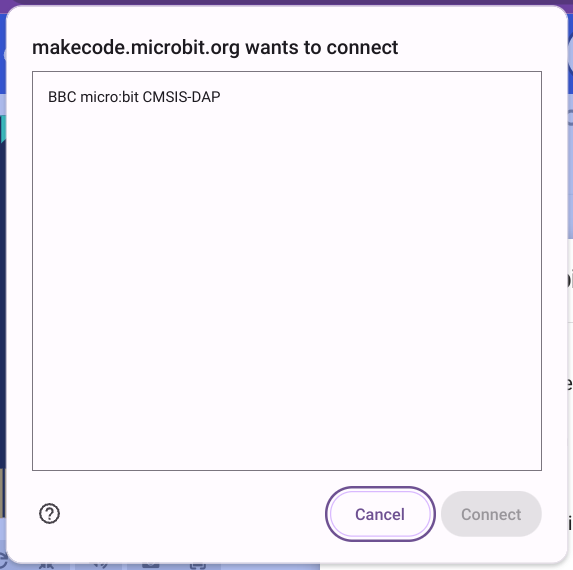
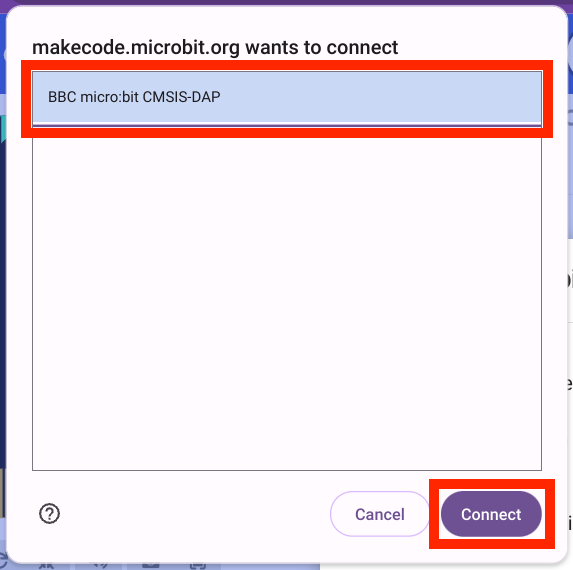
Select the device and select “Connect”.
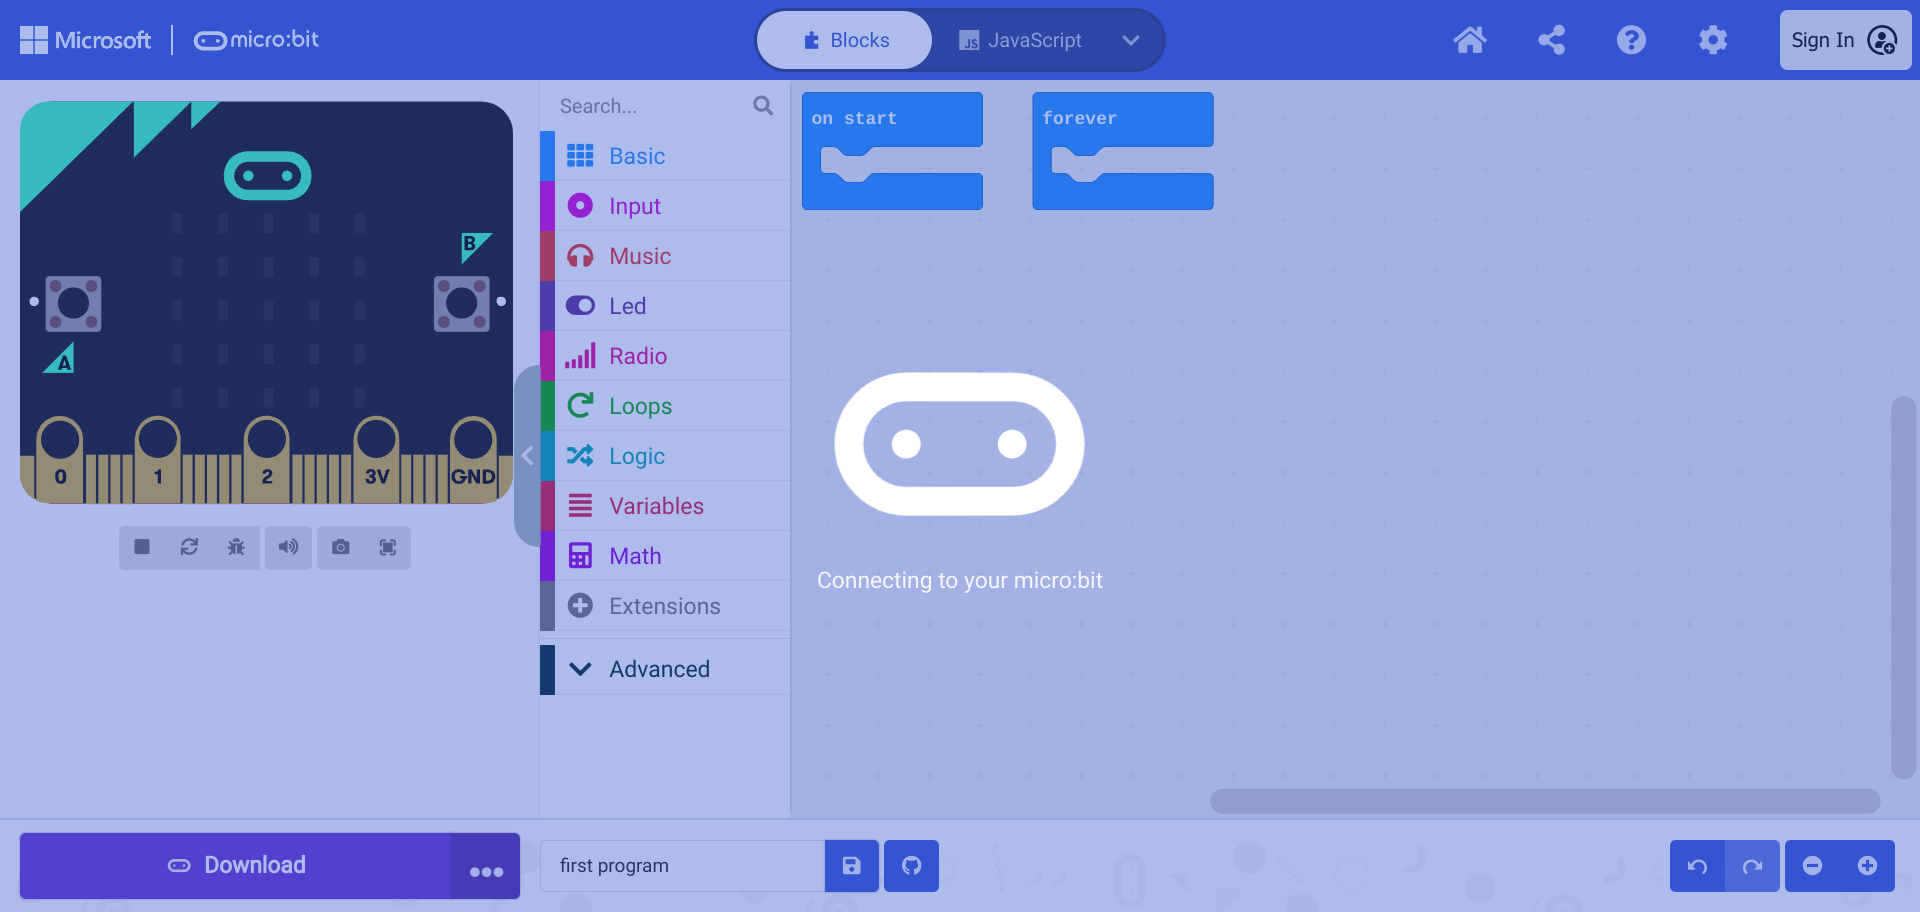
The computer will then connect to the micro:bit.
When pairing is complete, select “Done”.
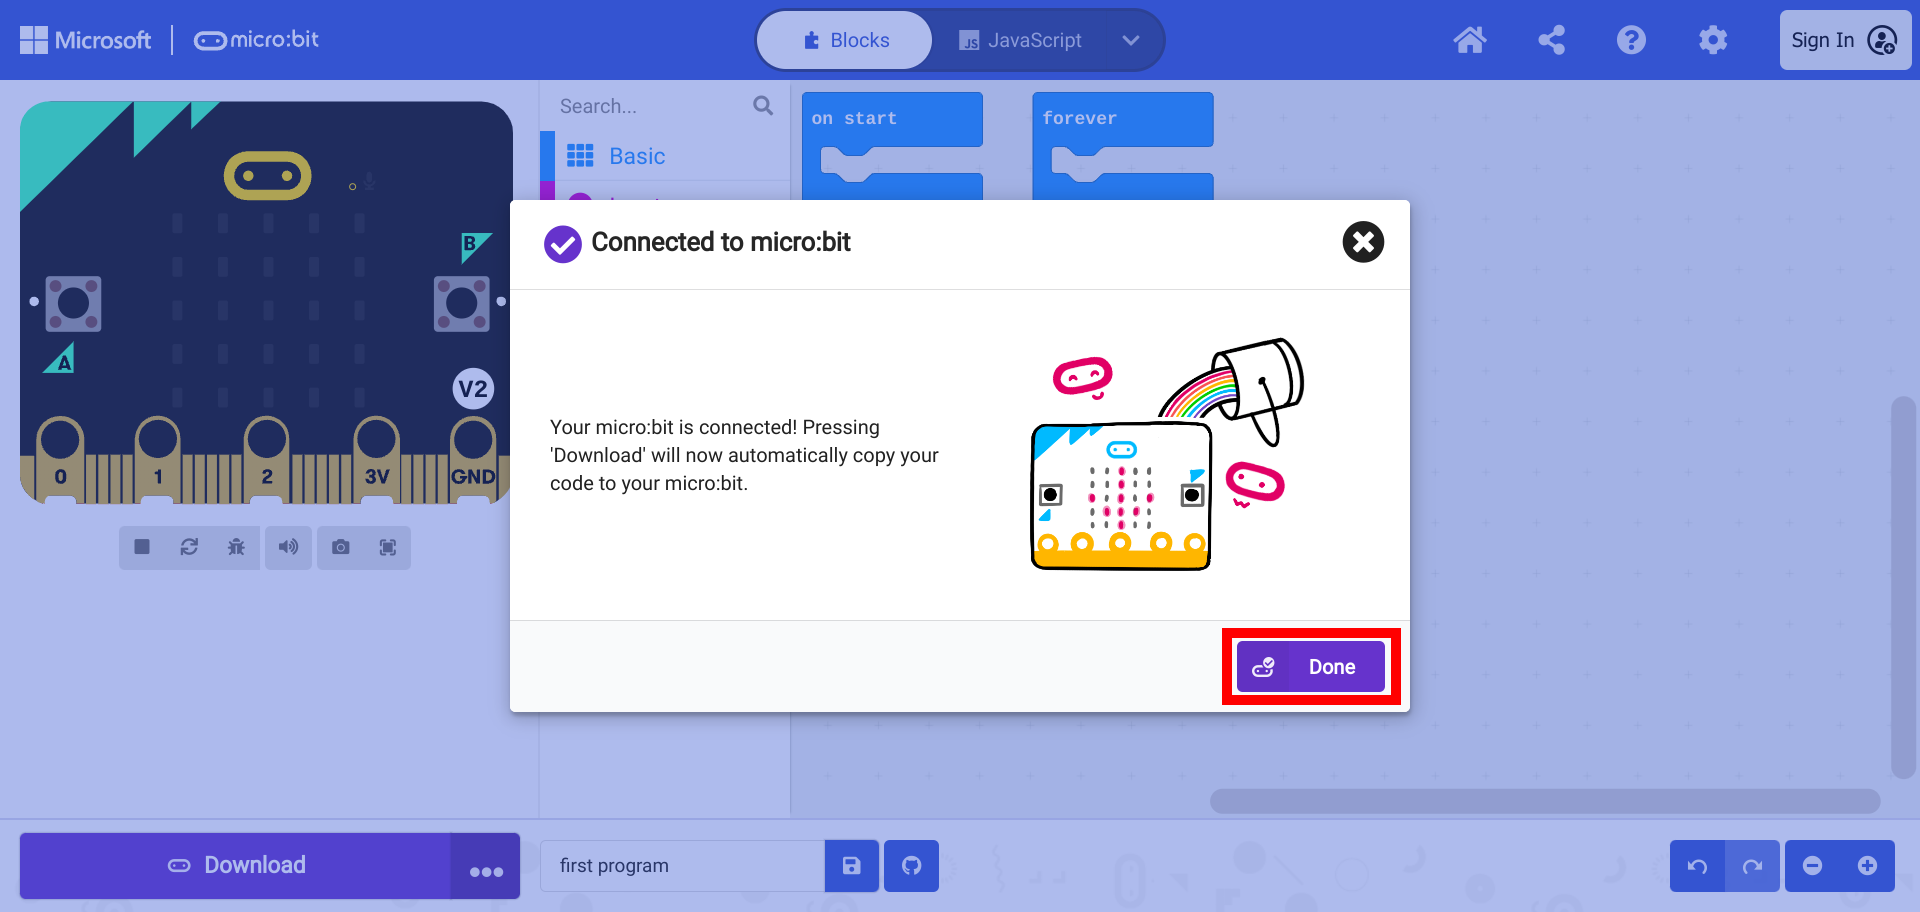
The micro:bit is now ready to be flashed with code.