Notes for Teacher#
Overview#
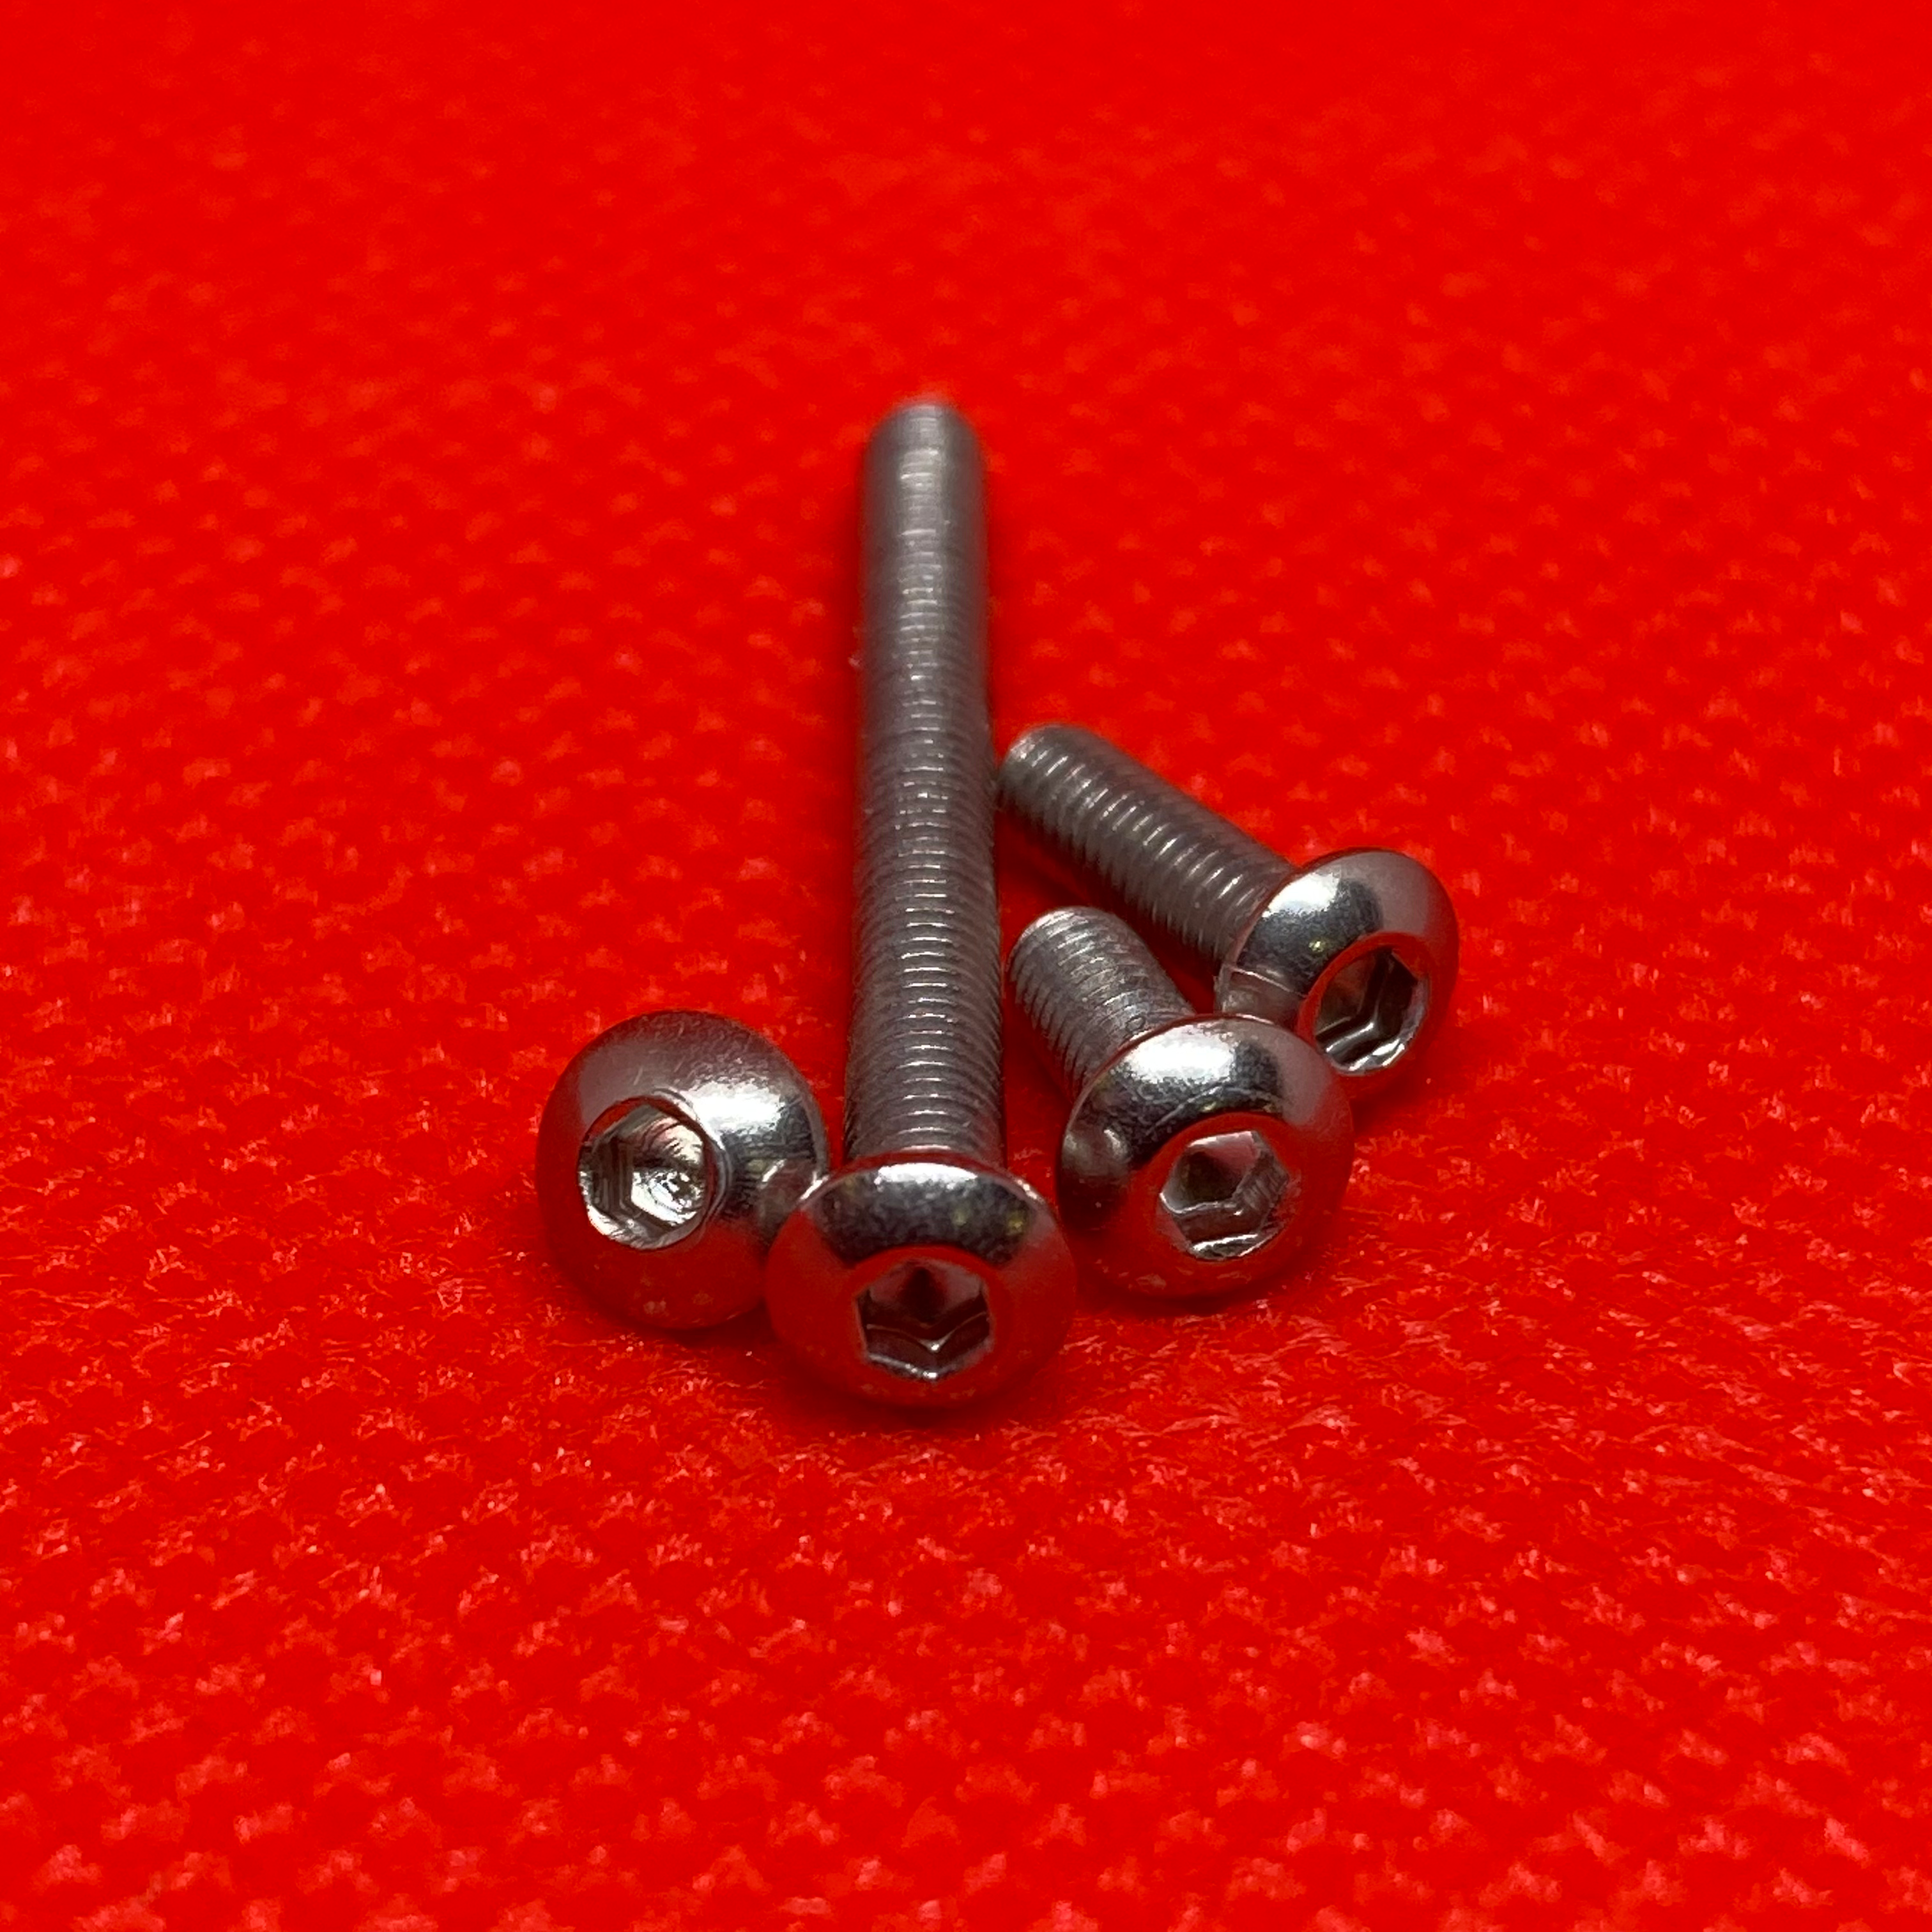
In this lesson, examples will be given for an M3 button head bolt with a hex socket as displayed below:
Attention
All measurements in the examples have been redacted. Students are meant to find values for the bolts independently. Teachers can request dimensions at simon@hasanprep.org.
General Notes#
Preparation#
Ensure all materials, especially the datasheets for M3 bolts, 3D printer, filament, and Tinkercad software, are available and ready for use. Check the 3D printer for any maintenance needs.
Introduction#
Explain the importance of precision in engineering and how this assignment will help students understand this concept. Discuss the specifications of M3 bolts and how to read the datasheets. The height of the test piece should be 3mm.
Guidance#
During the design process, guide the students in considering the bolt specifications in their designs. Encourage them to consider why specific hole diameters might work better than others.
Tip
Discourage students from erasing anything in their engineering design notebooks. Ensure them that there will be no point reductions for “mistakes” as they are part of the process. It is also good for them to indicate the version of the item that they are designing. In Tinkercad, it is also helpful to modify a copy and not the previous iteration of the item. Creating a system where the version number in the engineering design notebook and the version of the model is consistent will help the student when the time comes to reflect on the design process.
Safety#
Warning
Burn Hazard and Pinch Hazard
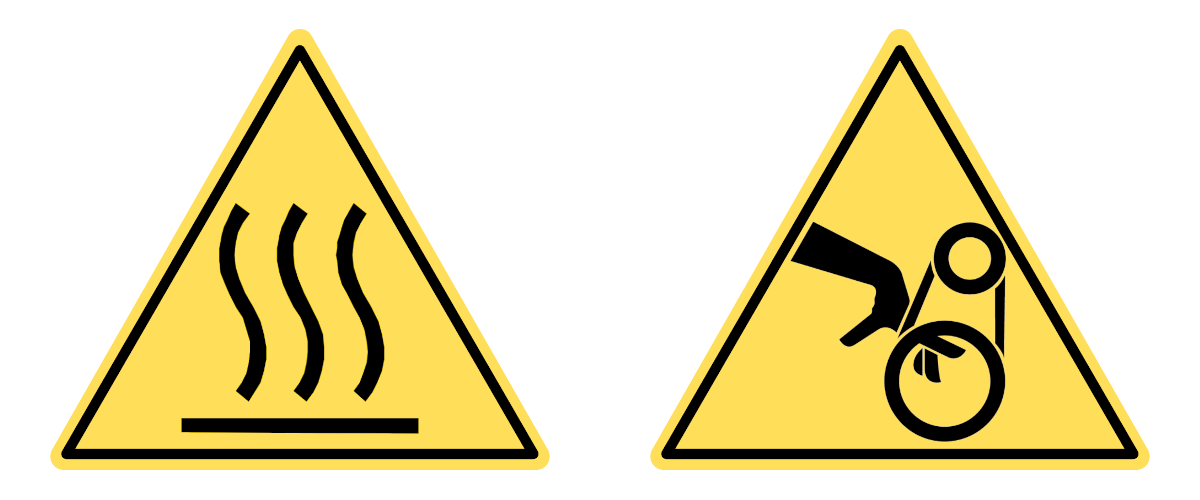 Fused filament fabrication 3D printing involves high temperatures above 180° C, and moving parts.
Ensure all students follow all established safety guidelines while using the 3D printer. It might be beneficial to do a safety refresher before starting the assignment.
Tip
Developing a badge system where students earn badges for undergoing safety training and pass a safety test is helpful. Equipment safety tests are available on ITEEA’s Safety Resources page.
Assessment#
Use the provided rubric to assess each student’s work. Remember to give constructive feedback to help them improve.
Differentiation#
Be prepared to support students struggling with the assignment. This could include providing templates, one-on-one assistance, or additional resources. For more information, visit the Differentiation section of this lesson.
Reflection#
After the assignment, have a class discussion about the results. Which hole diameters worked best? Why? What would they do differently next time?
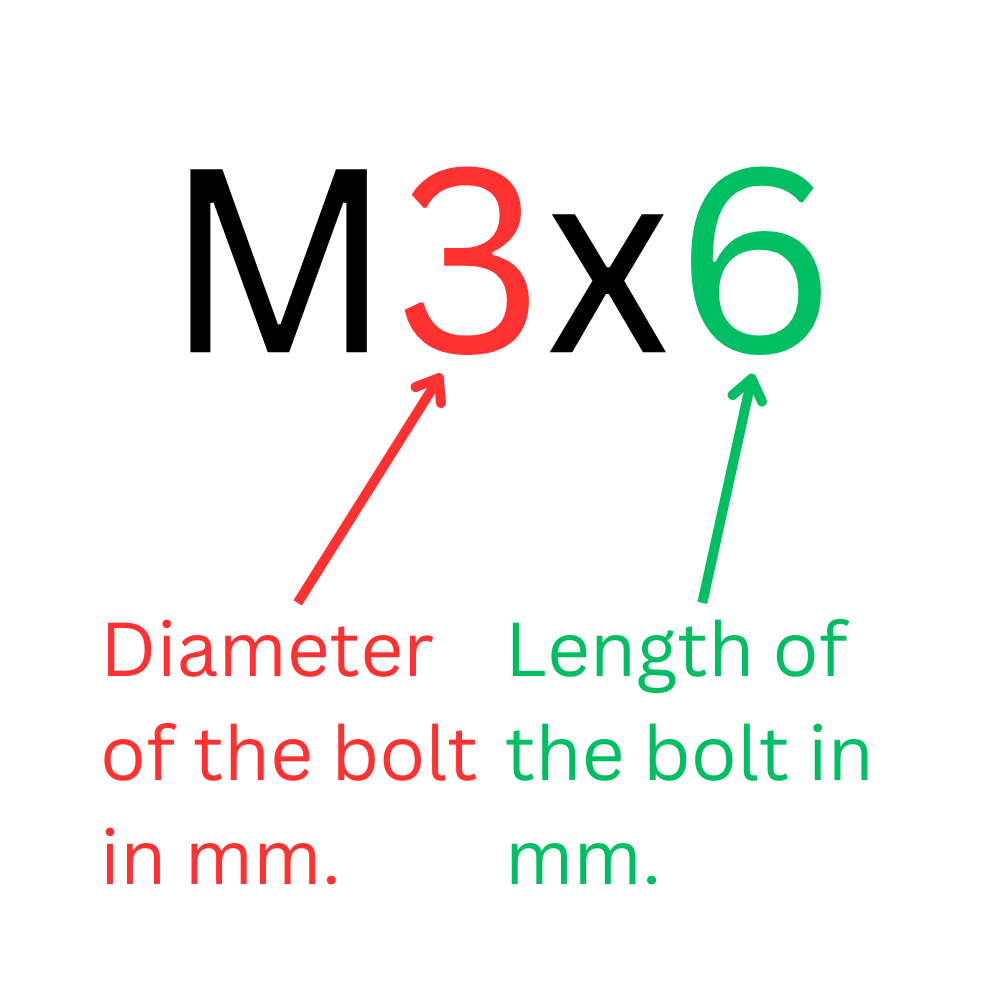
Understanding Metric Labeling#
The image below labels the numeric labels in the notation describing metric bolts.
Note
M3 bolts have been chosen for this design project because they fit most of the mounting holes found on electronic components. Occasionally, an M2.5 bolt may be needed. Check any datasheets or diagrams of the components to see if an M2.5 bolt is required.
Metric Bolt Measuring Tool#
Collecting the bolts and sorting them can be an overwhelming task. Luckily, people have created tools that can be 3D printed to help determine the width (M2, M2.3, M3, etc…) and the length (x4, x6, etc…) of bolts.
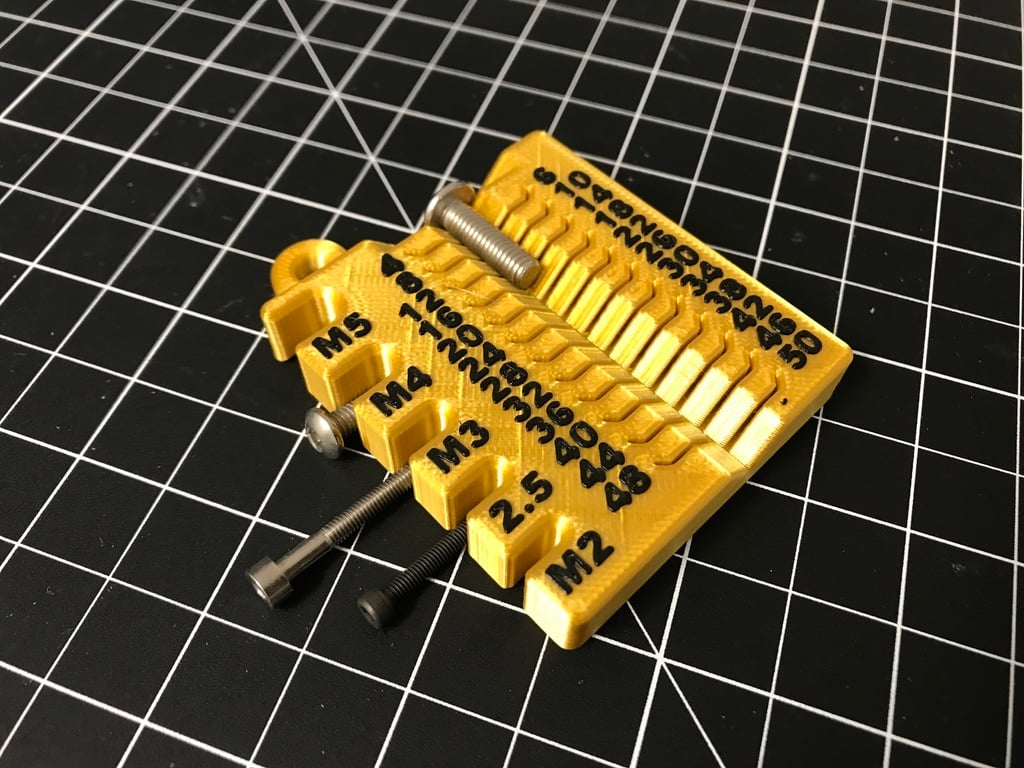
Here is a file on Thingiverse of one such tool that can be used to help determine the size of metric bolts:
Metric screw measuring device - M2/2.5/3/4/5 4-50mm by cmh - Thingiverse
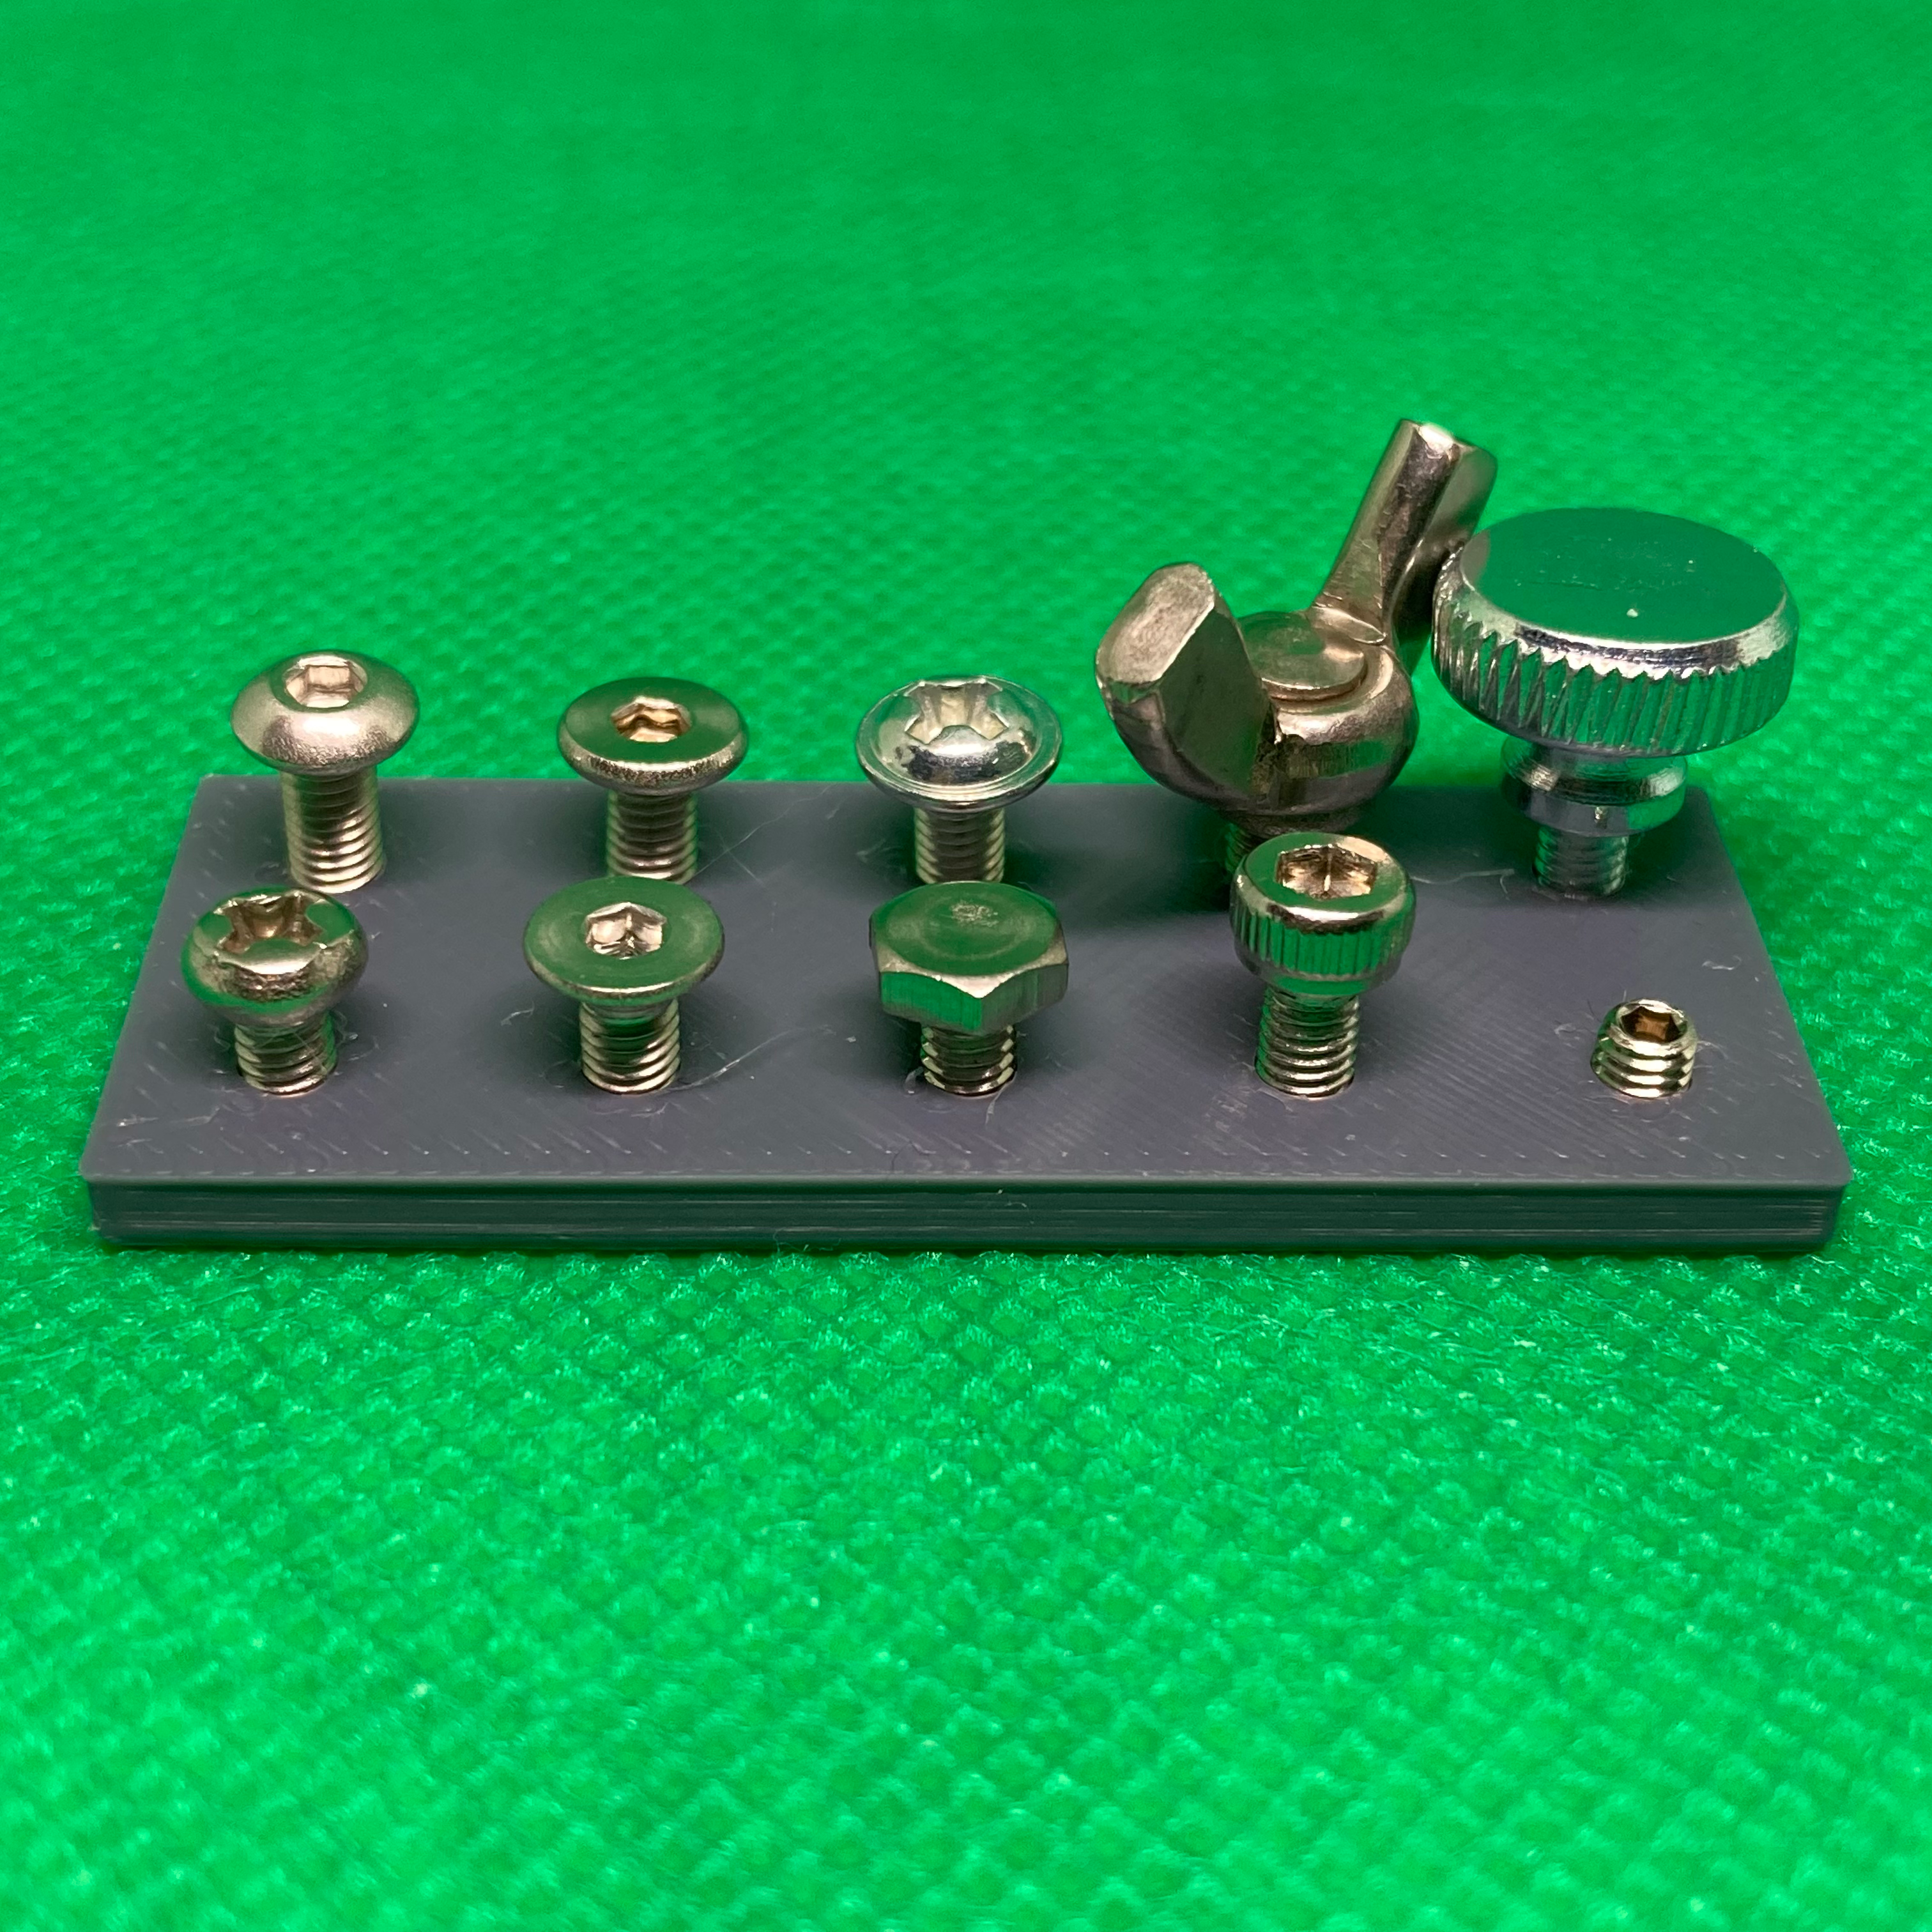
Types of M3 Bolts#
There are a variety of heads for M3 Bolts available. The shape of the head varies according to the intended use of the bolt. Some bolts have a head. that requires tools that are uncommon to discourage the removal of the bolt. Some have a head optimized so they can be removed by hand. Other bolts have a head that reduces the profile of the bolt.
Sourcing Materials#
M3 Bolts#
M3 bolt sets are available on Amazon. These bolts are more expensive and may contain sizes that are not necessary for the project. Furthermore, the bolts on Amazon do not have a diagram or datasheet.
Sourcing bolts from AliExpress is more affordable. You can buy the right amount of specific sizes needed at a lower cost. The vendors often include the specifications of the bolts in the images that can be screen-captured for distribution. The only drawback to Aliexpress is that it takes longer to deliver the items.
Some consistent vendors on AliExpress for M3 bolts are:
WanFang Hardware Fasteners Co.,LTD
Tip
When sourcing M3 bolts, remember that some may require different tools for removal. It may be best to choose M3 bolts that can be removed with commonly available removal tools. Here are some examples of heads and tools that are compatible with the heads:

3D Printers#
This project works best with a newer generation high-speed 3D printer. The test pieces can print in 4 to 8 minutes, depending on the object’s size. These printers are becoming less expensive and more prevalent on the market today.
Here are some high-speed 3D printers:
Filament#
Filament can be expensive. Luckily, Voxel offers inexpensive filament that works well with high-speed 3D printing. They offer discounts when purchasing 3 or more spools:
Follow-Up Lessons or Extensions#
The two examples below can be used as follow-up lessons or extensions to the lesson. It may be the case that the students’ designs may require one of these modifications.
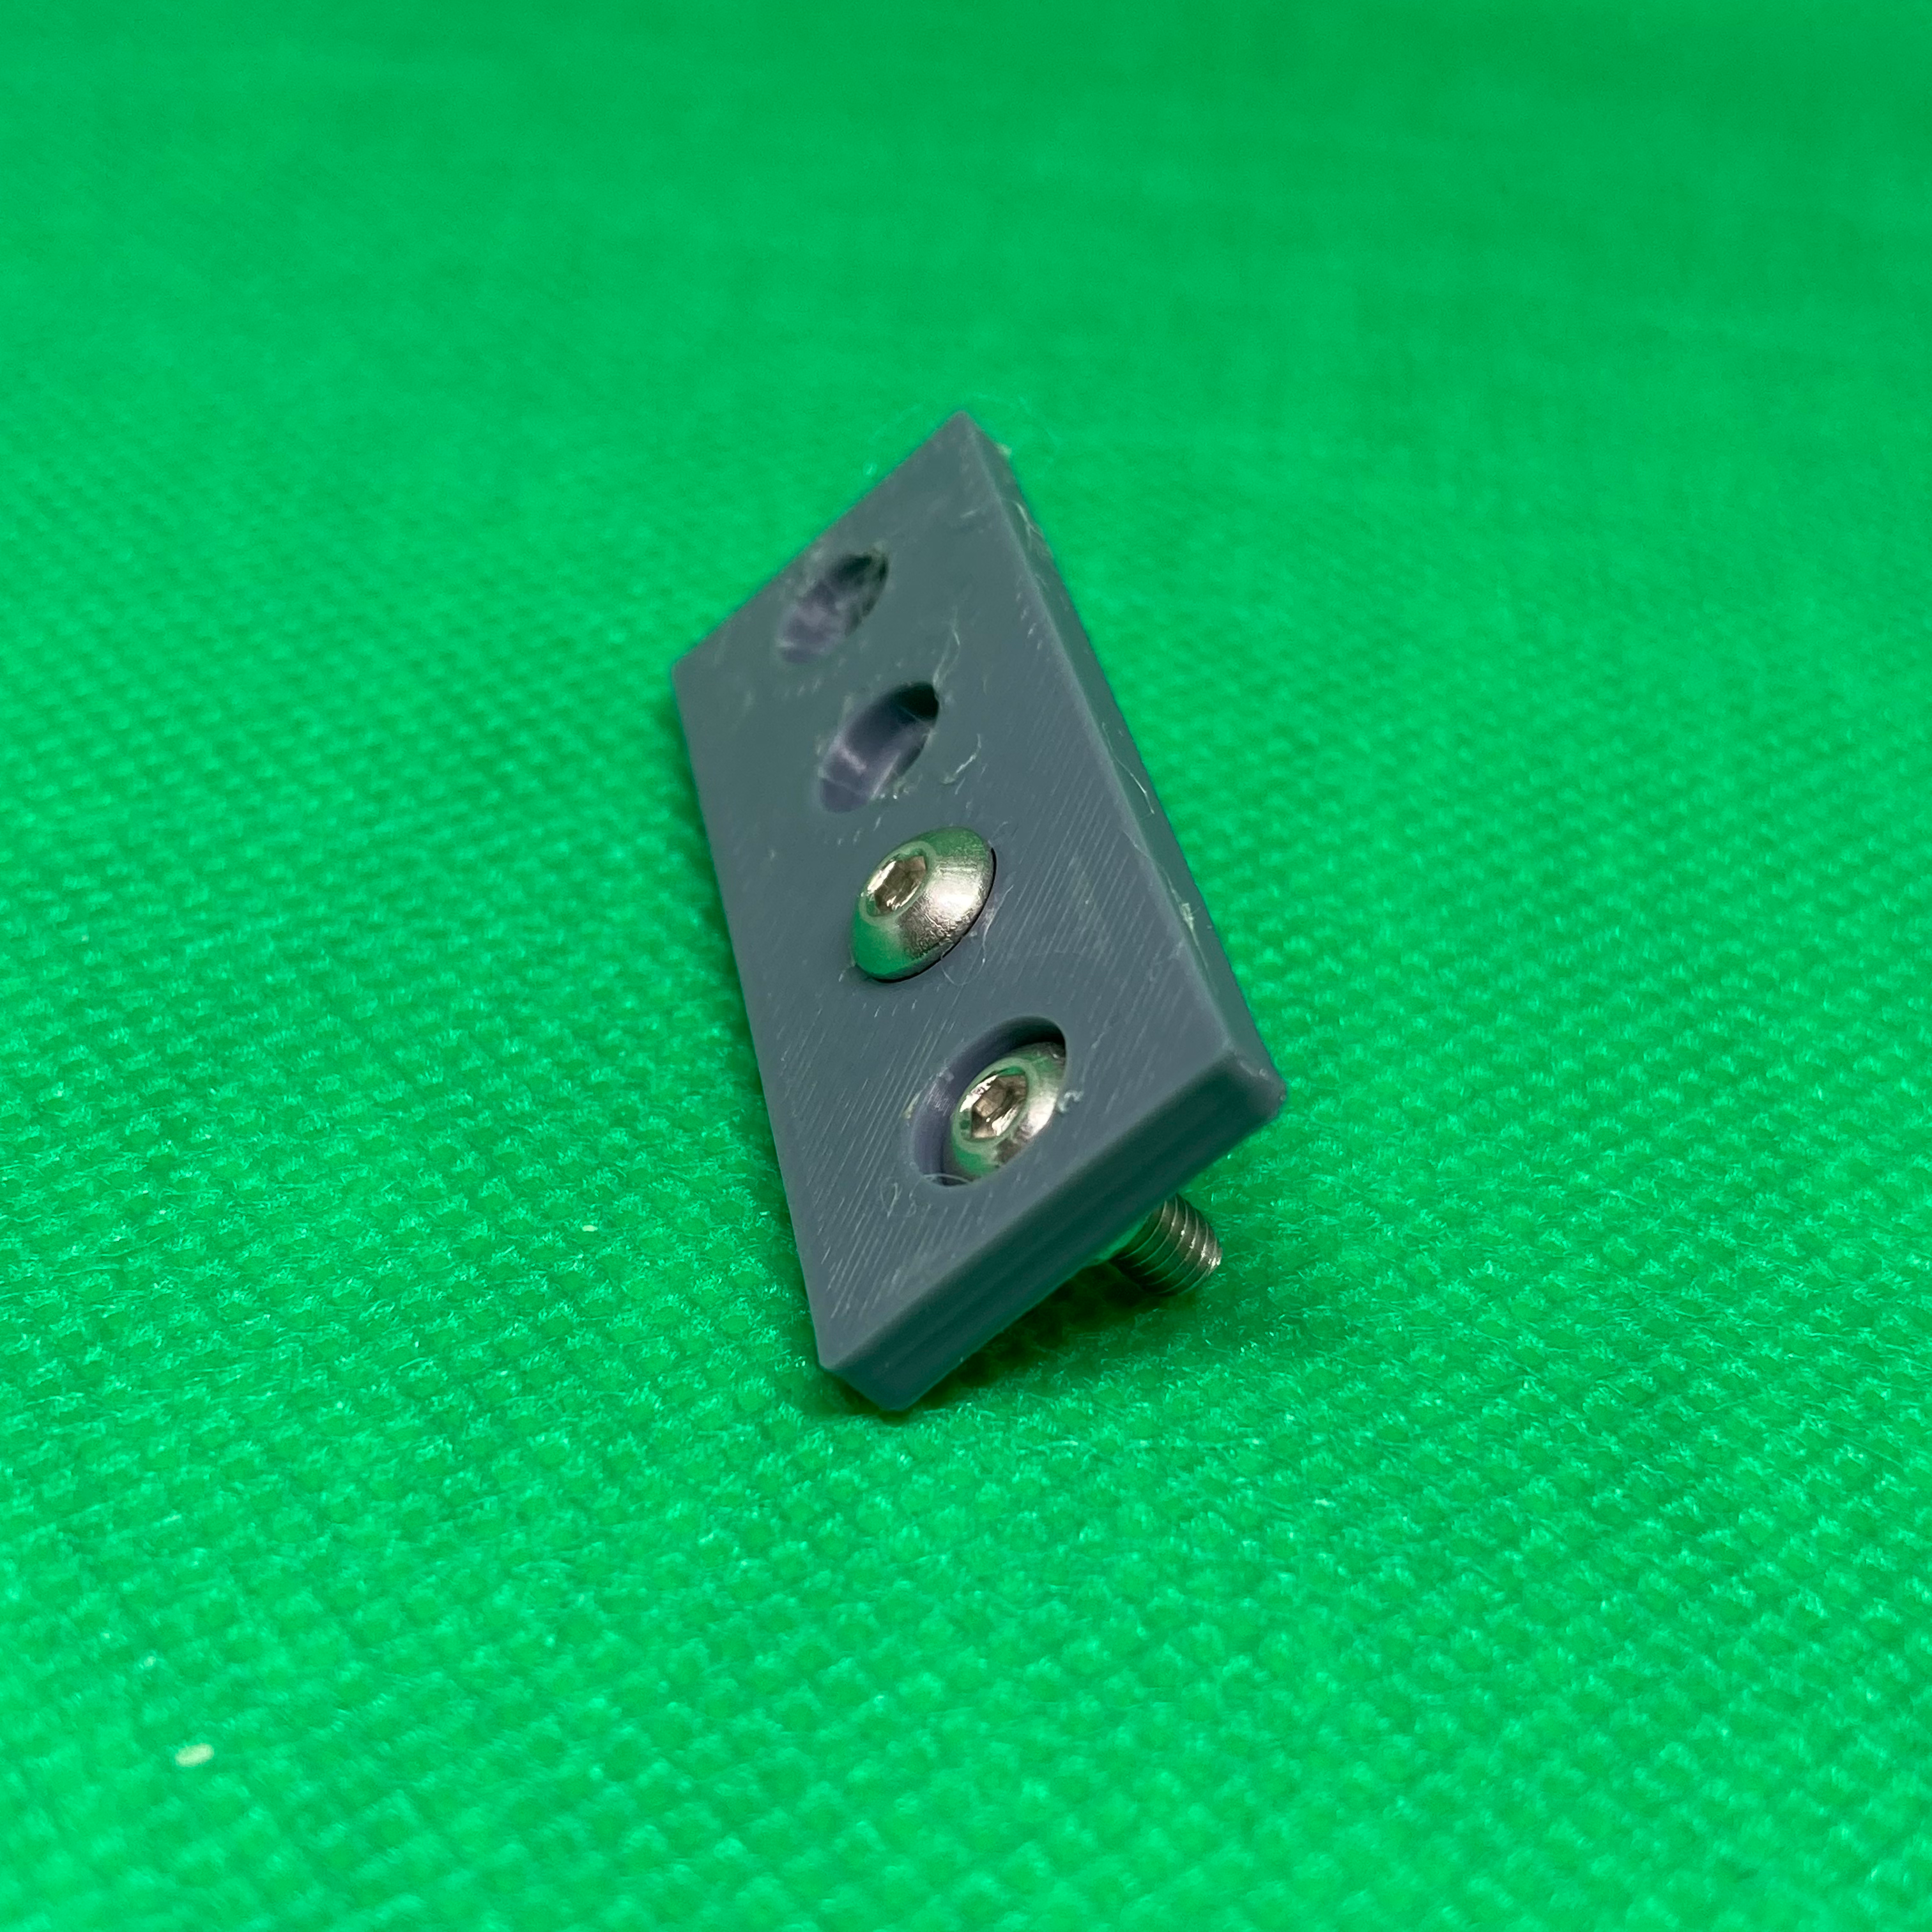
Creating Holes for Recessed Bolts#
Using the same materials from this lesson, students can create holes to recess the bolts to create a flat surface for other components.
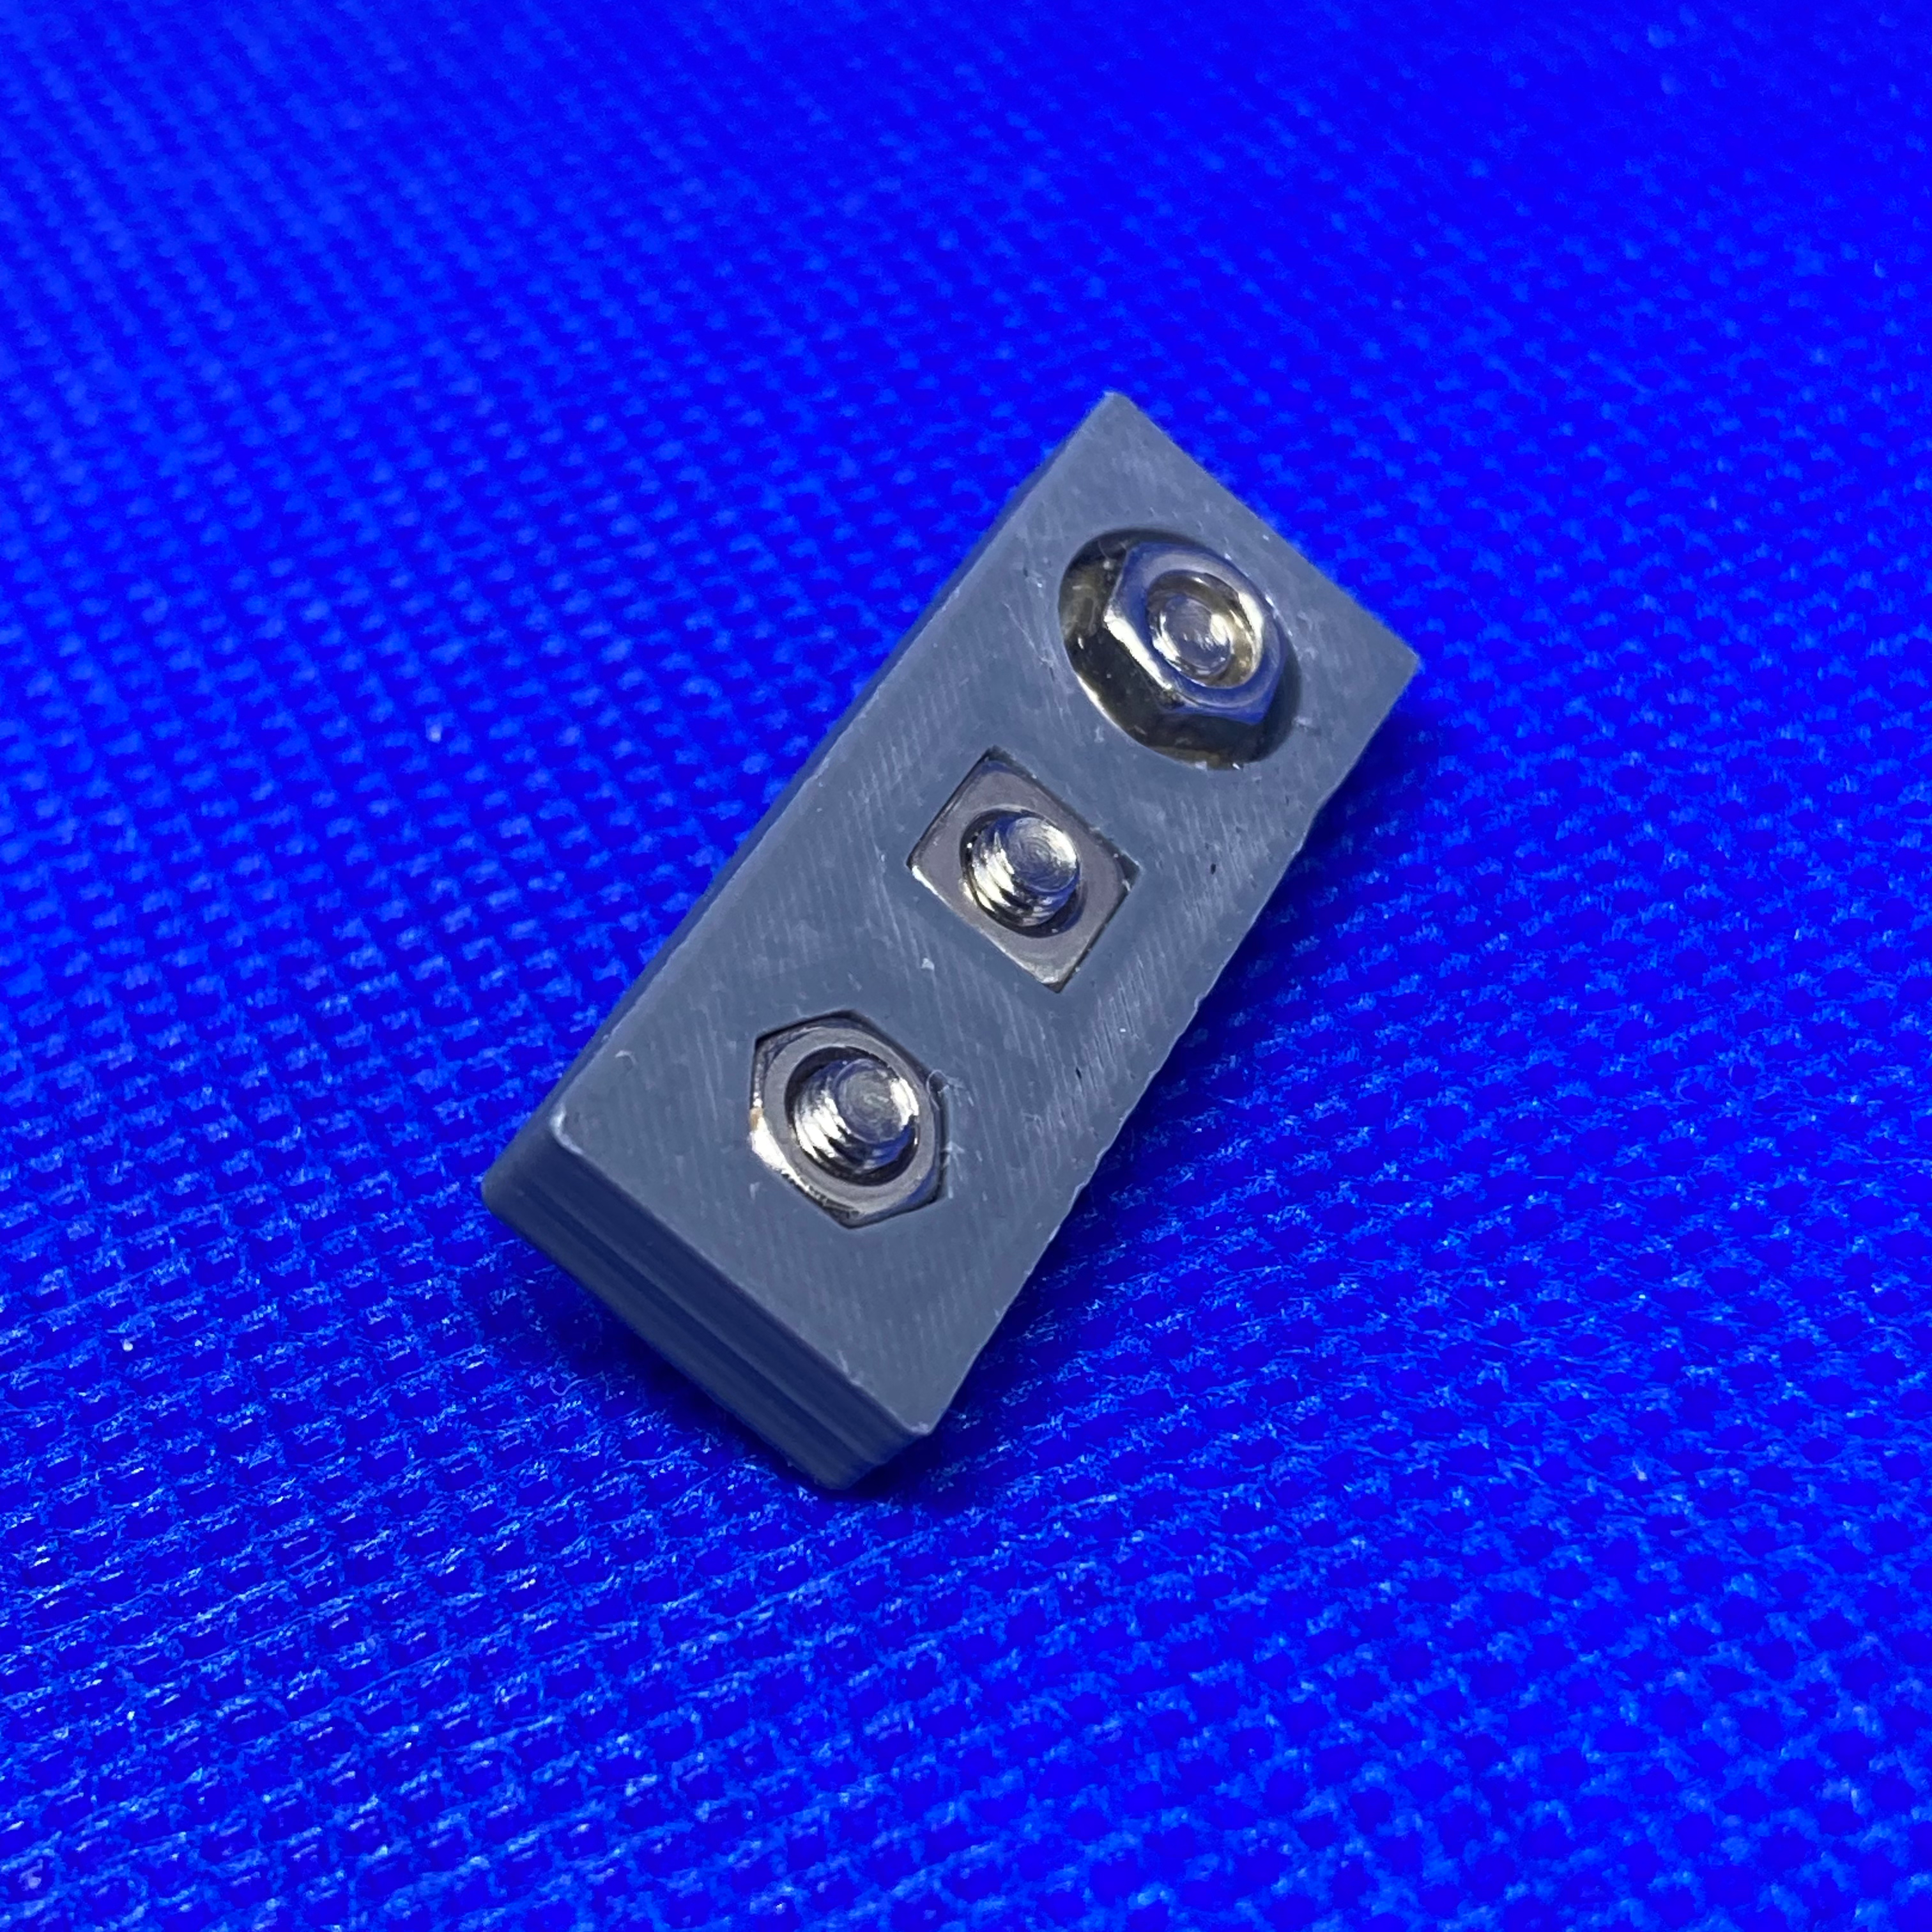
Created Holes for Recessed Nuts#
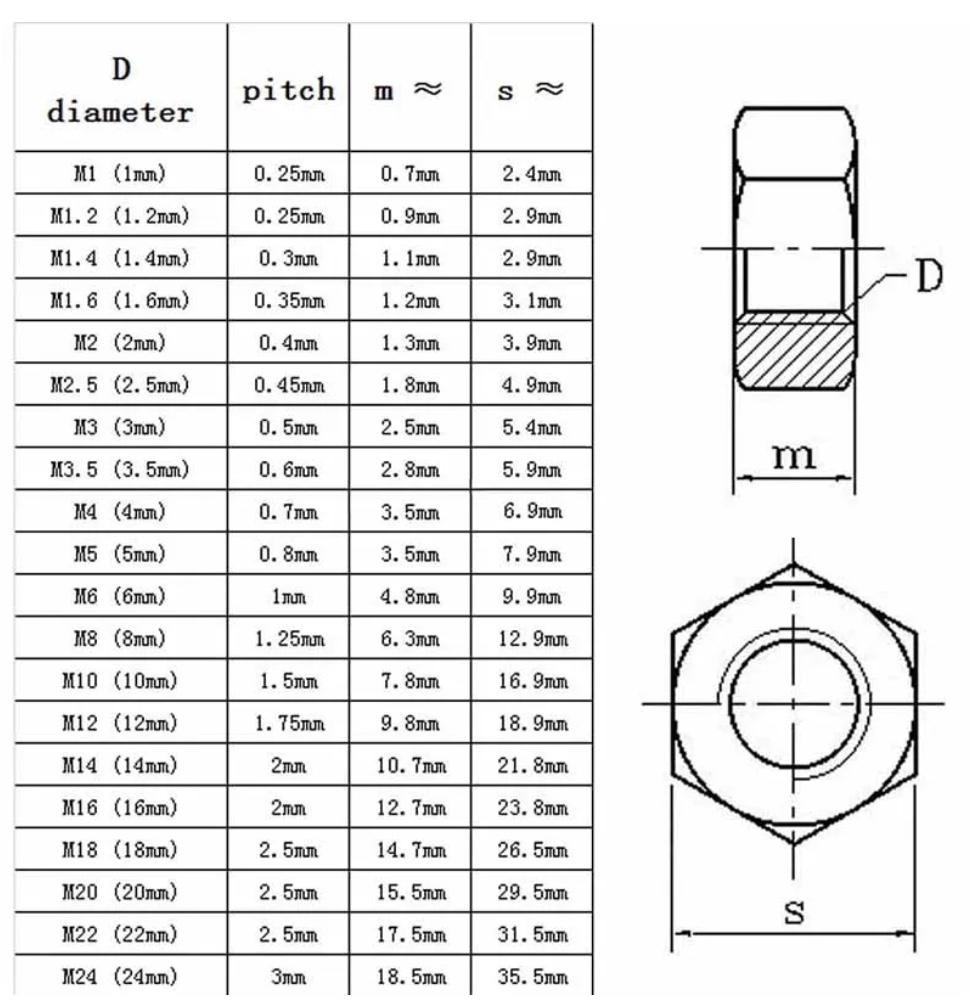
Another possible lesson that can be directly modeled after this is one where students create recessed holes for the M3 nuts. This can help to tighten the bolt without a tool and create a surface without protrusions.
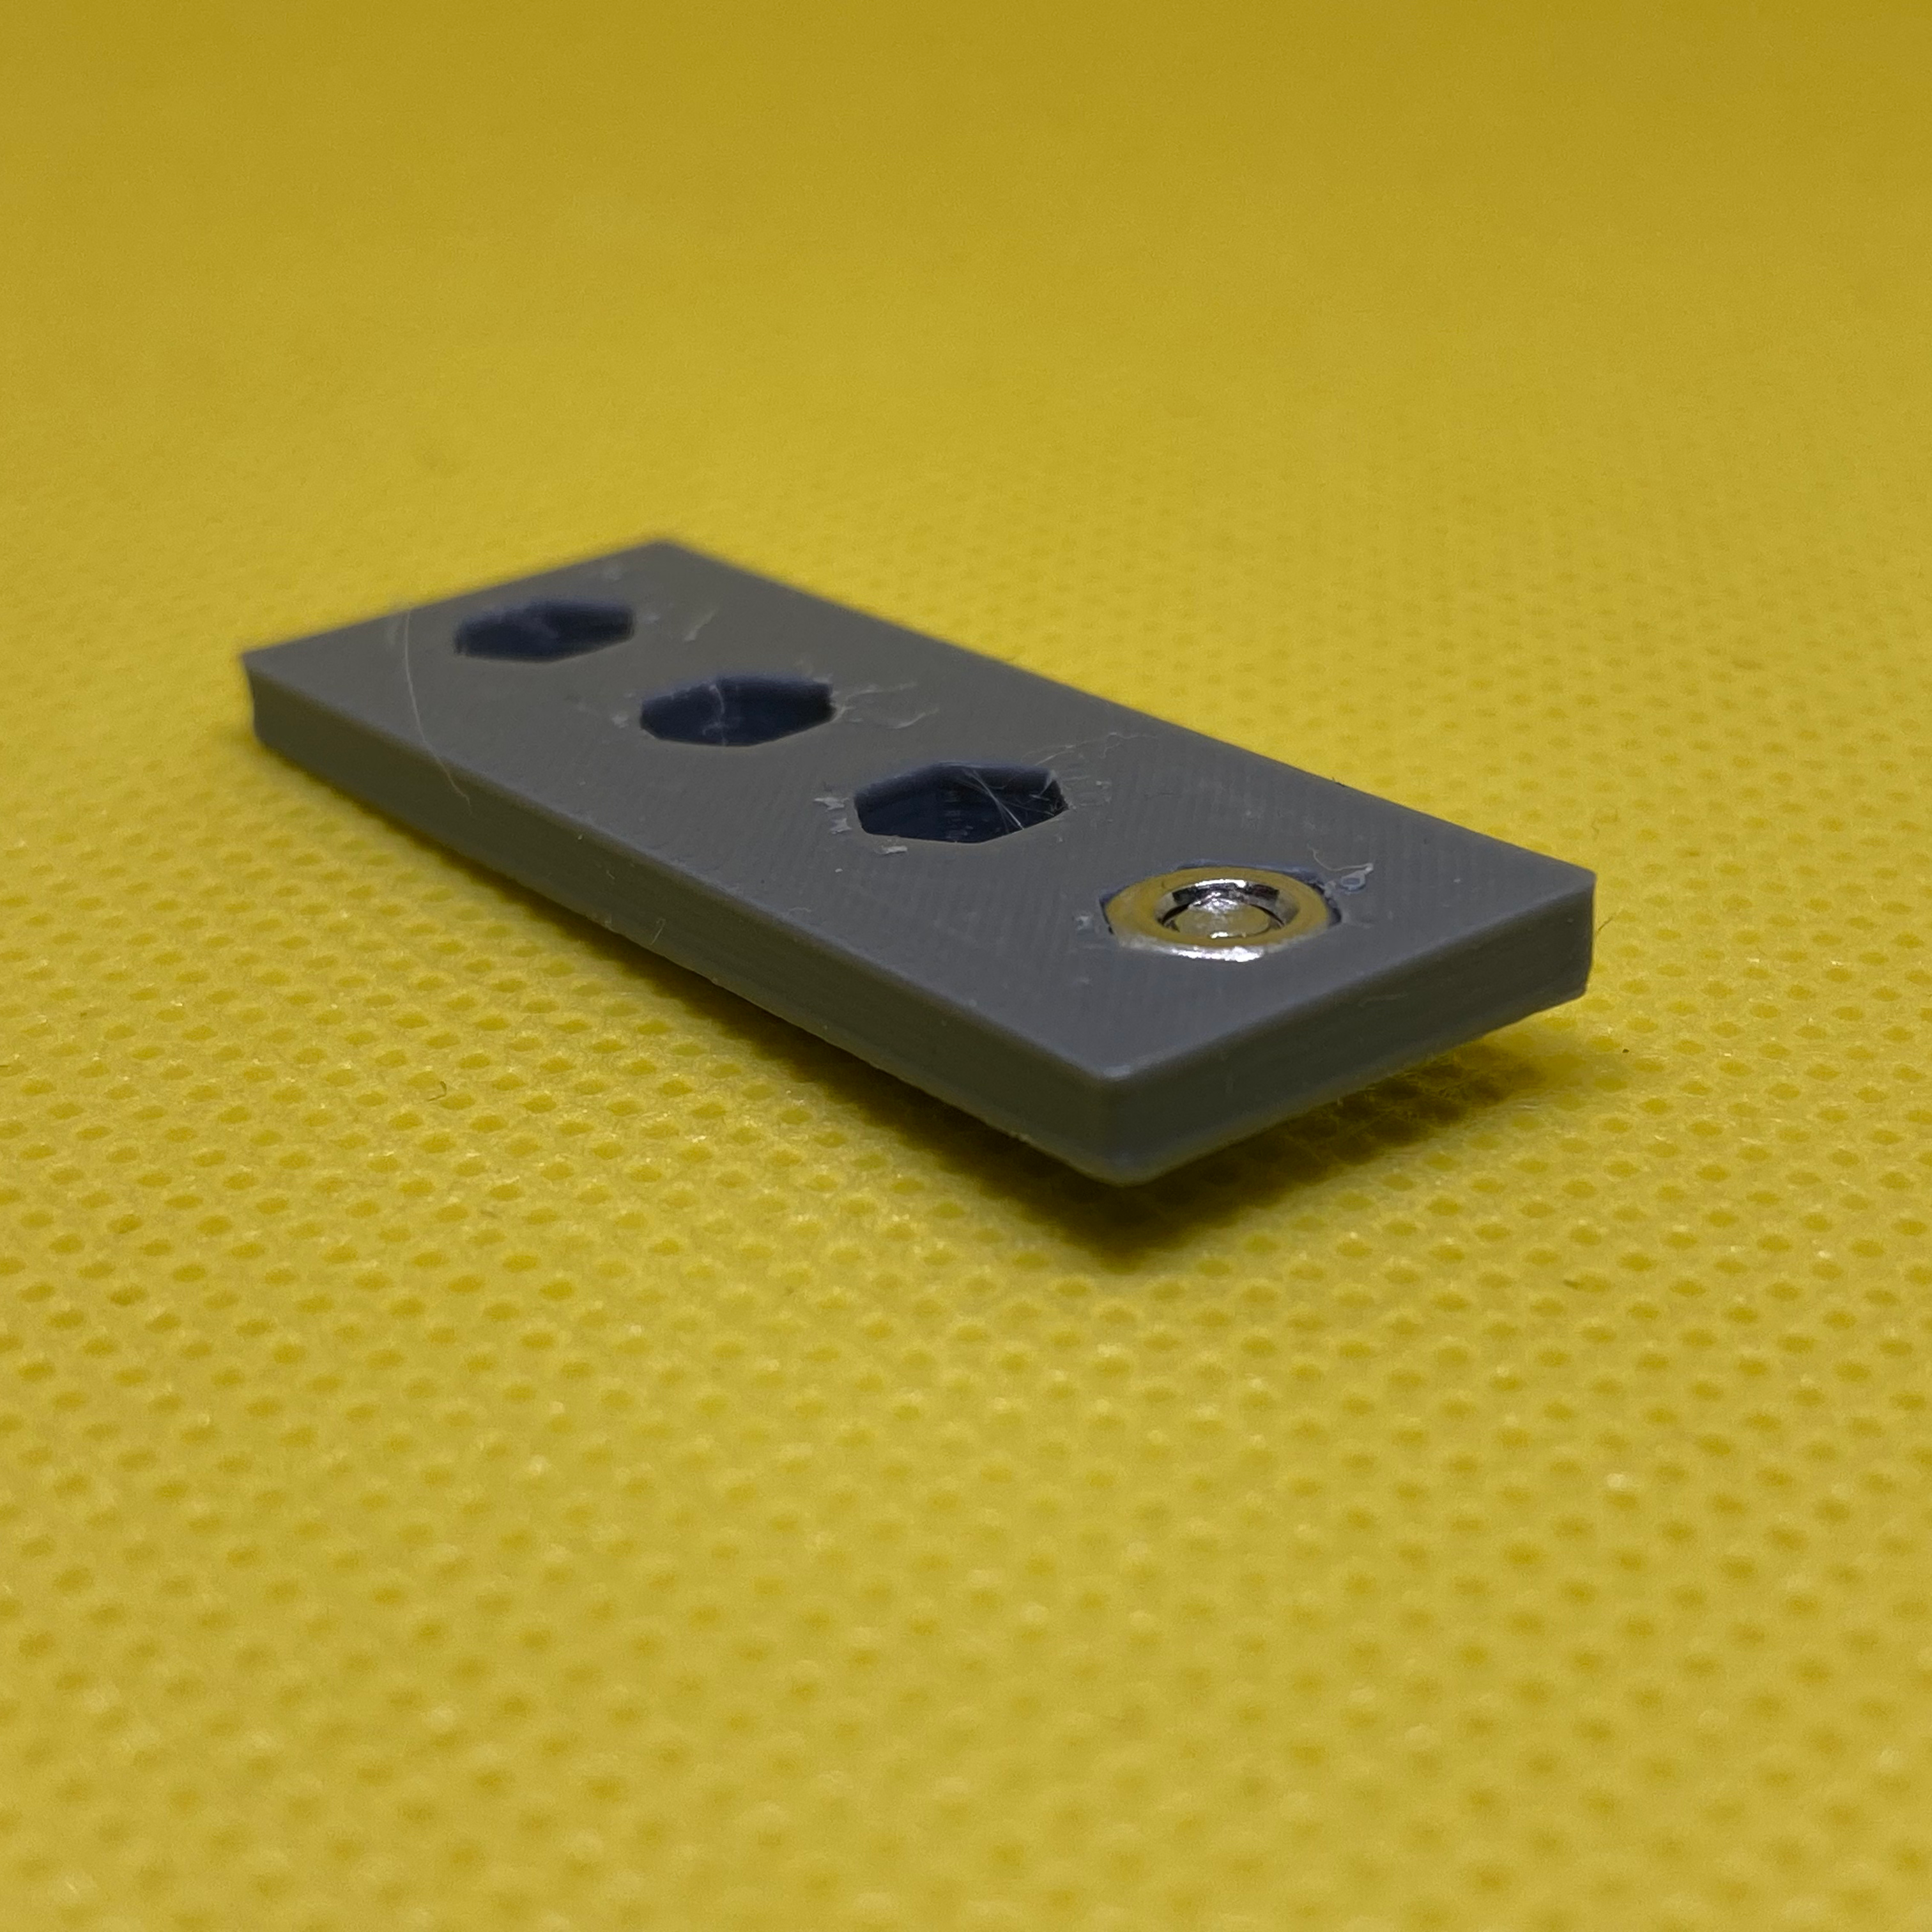
Students can use a datasheet to create the recess holes in their engineering design notebook.
Note
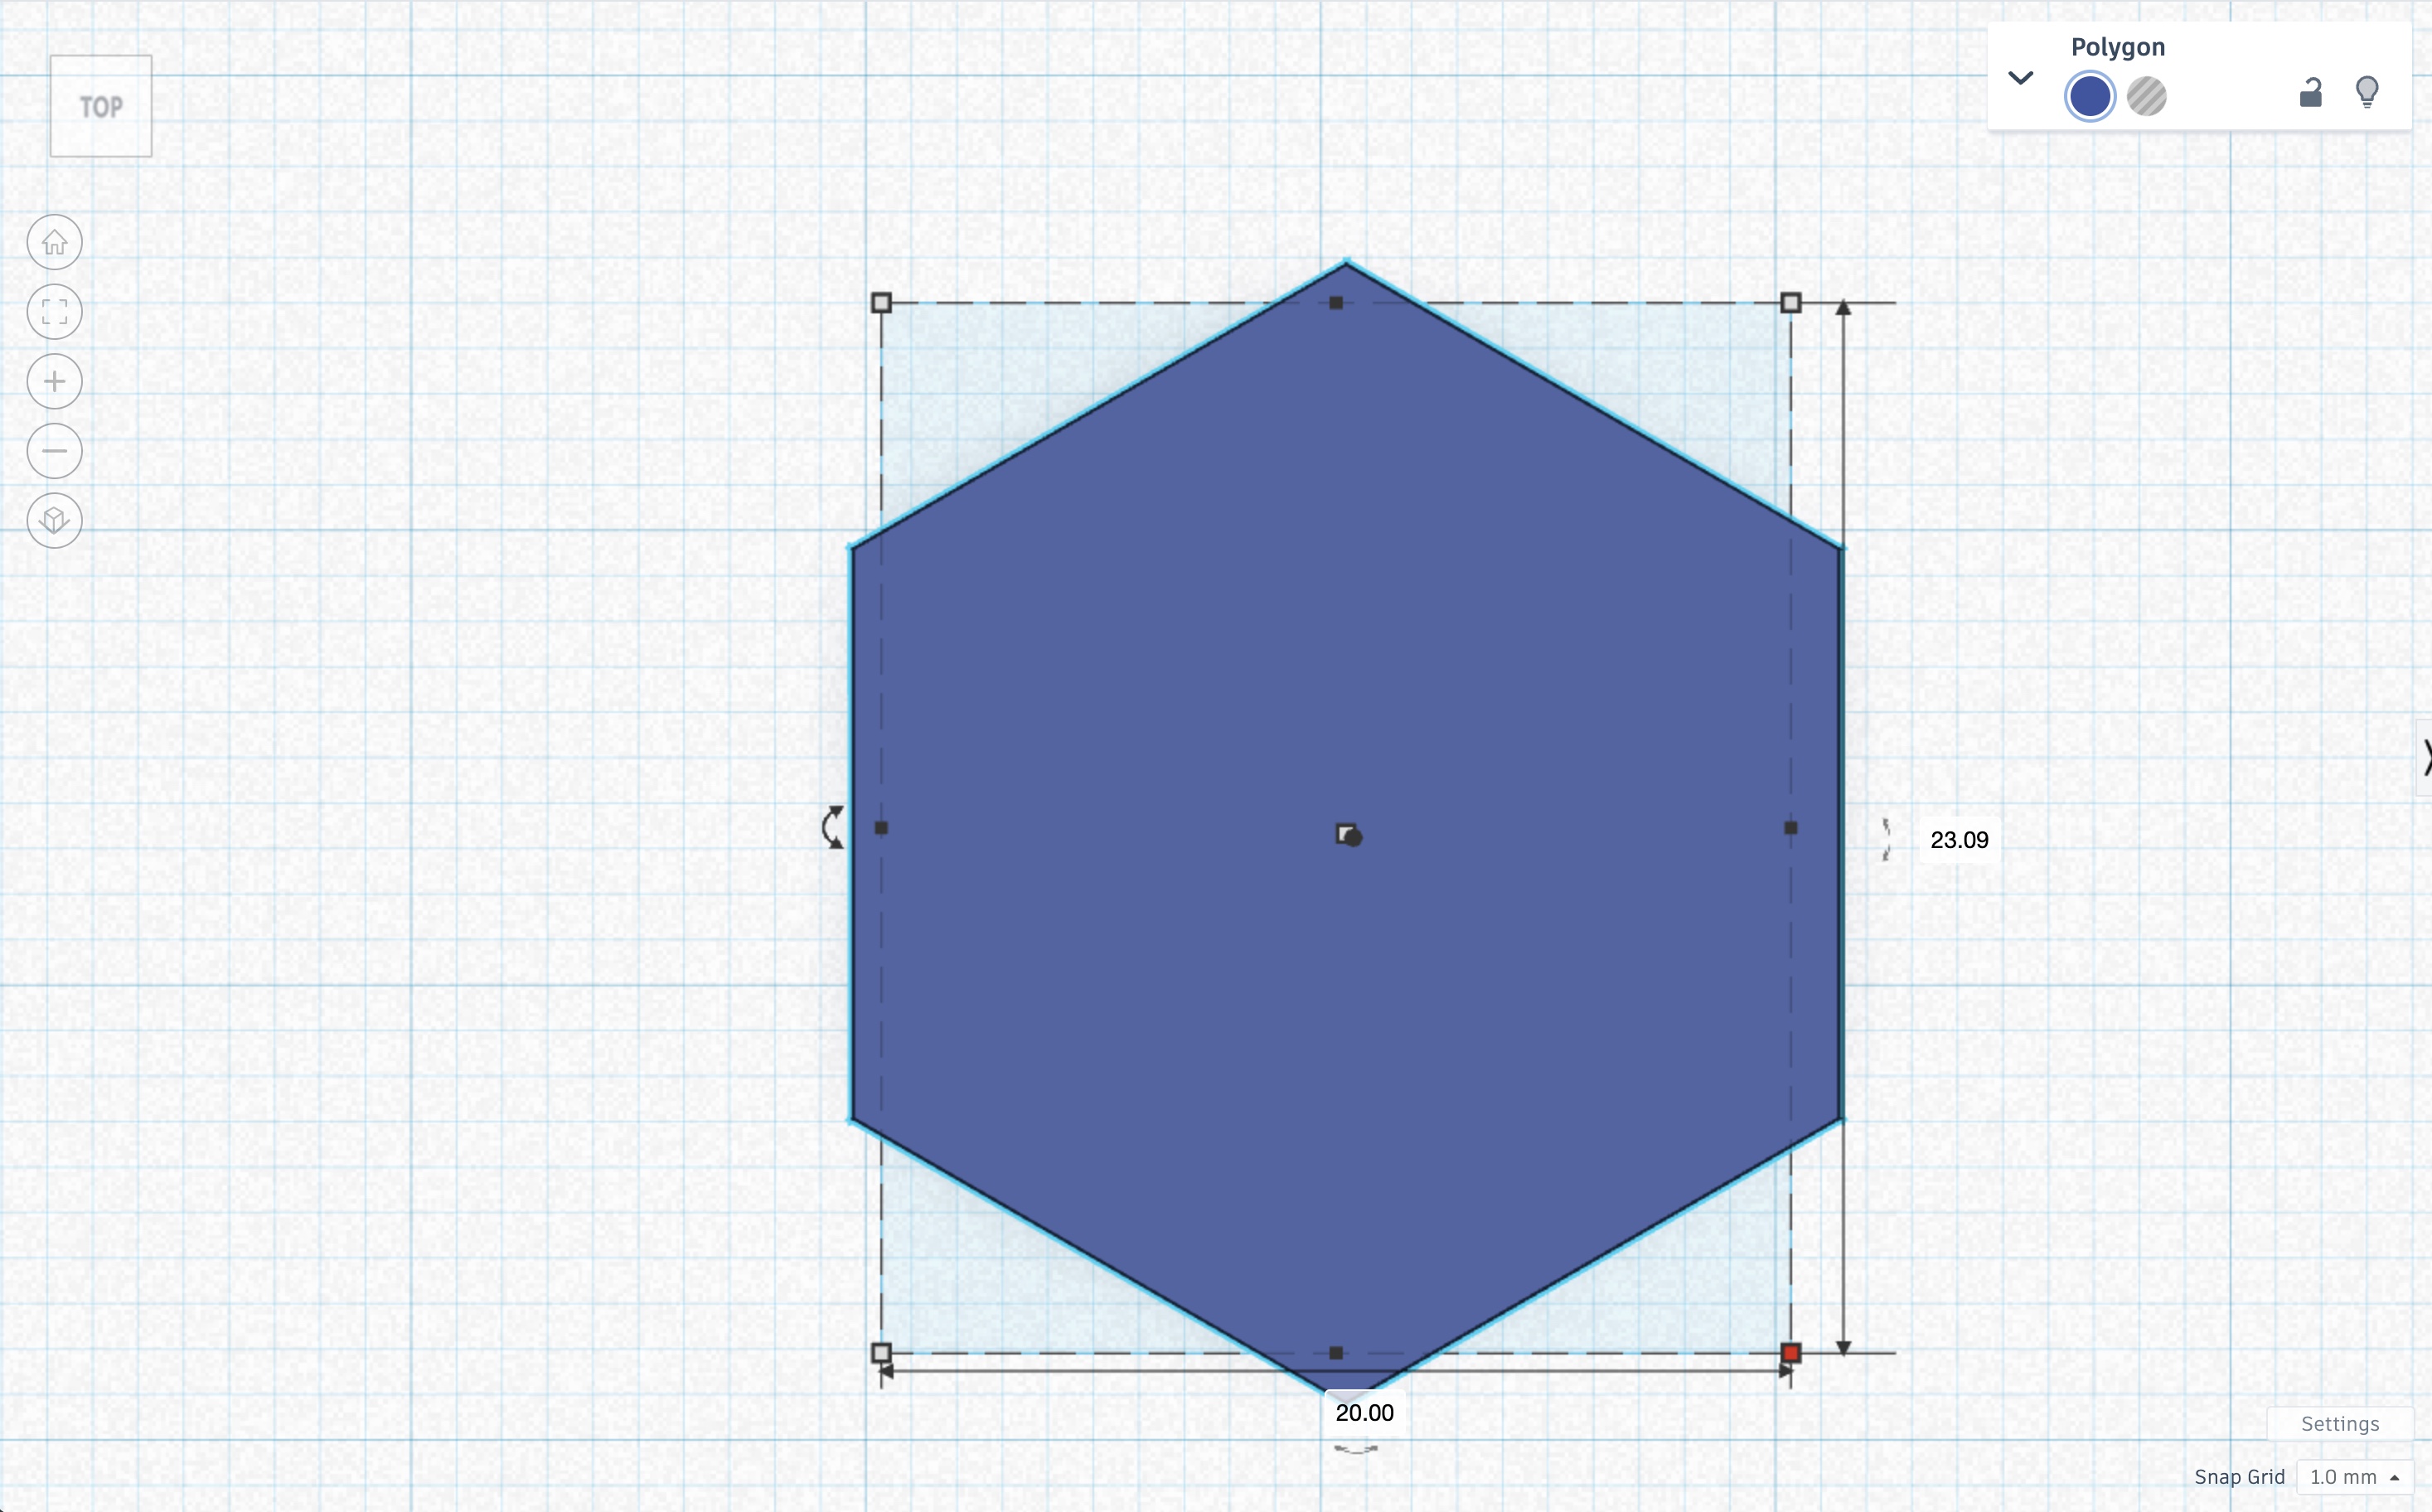
Tinkercad does not scale objects uniformly. Students will have to calculate the ratio. This is an excellent opportunity to integrate mathematics in the lesson.
The image below demonstrates the height-to-width and width-to-height ratio of a regular hexagon:
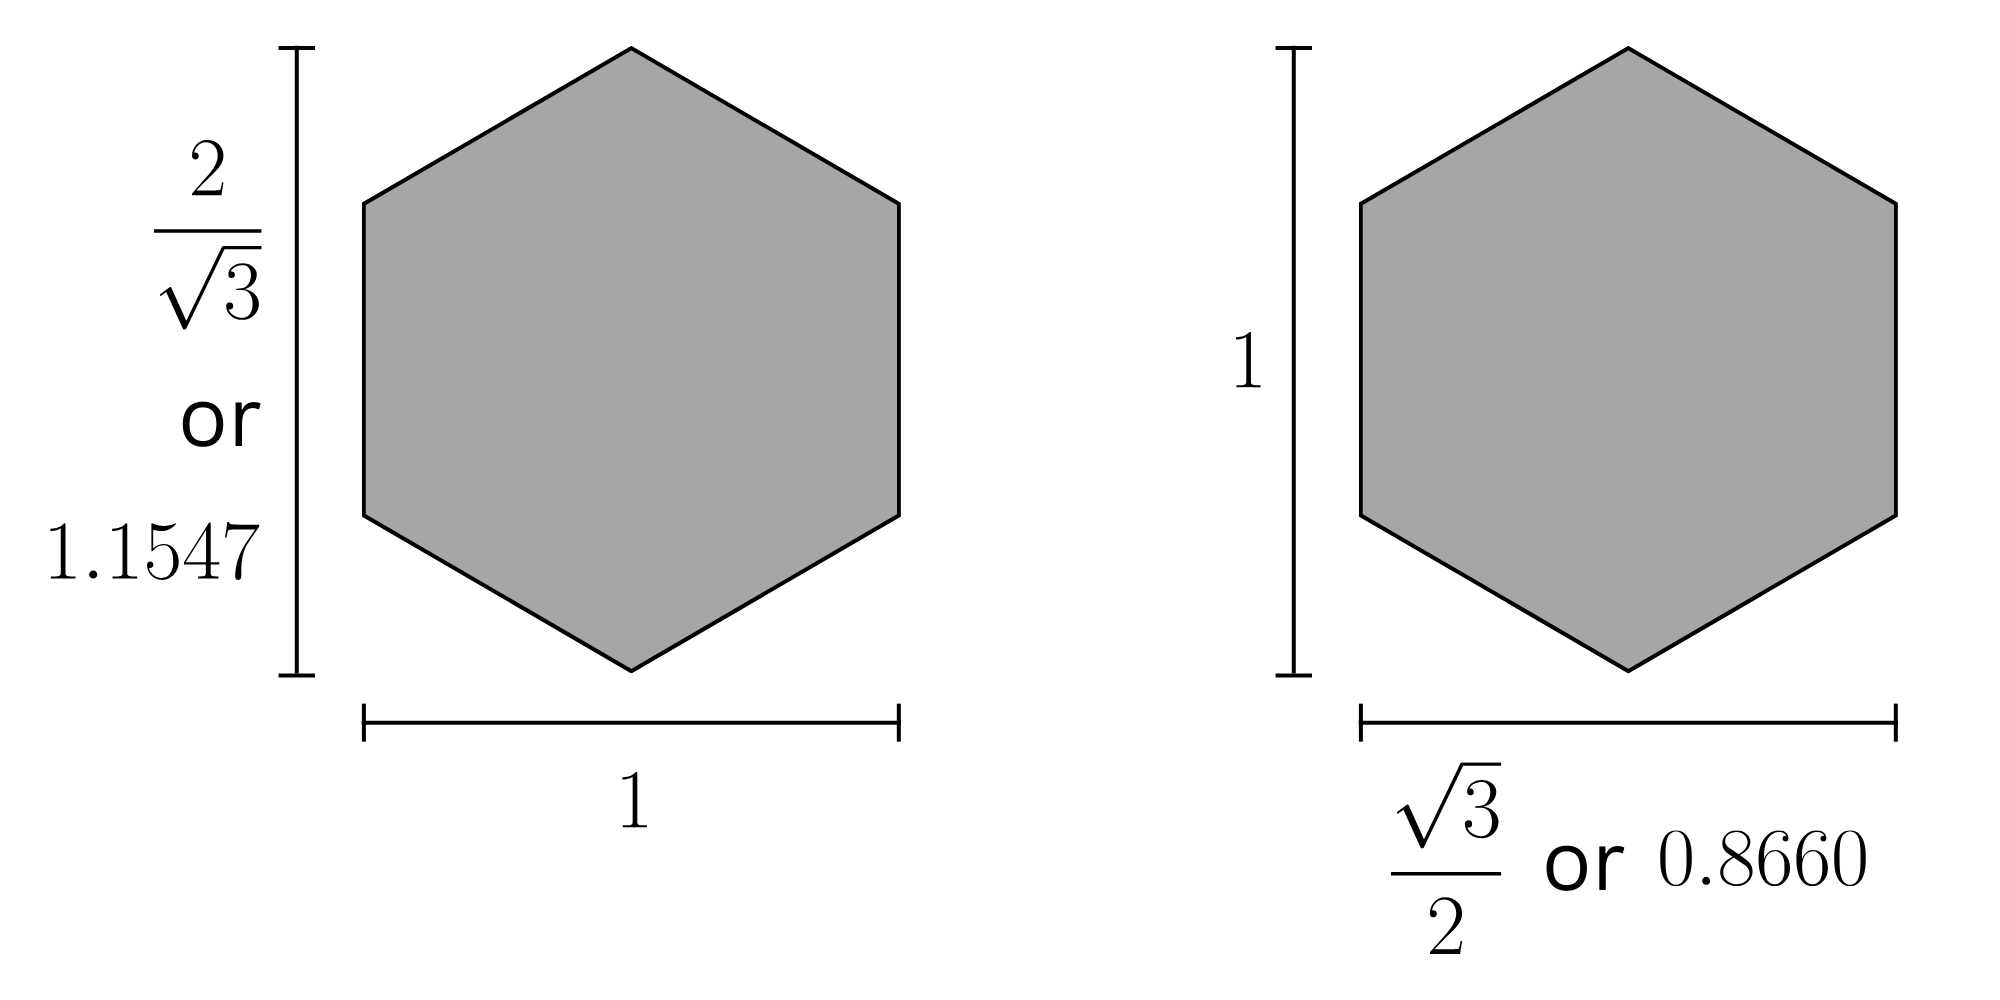
The hexagon on the left has a \(\frac{2}{\sqrt{3}}:1\) or \(1.1547:1\) ratio. The hexagon on the right has a \(1:\frac{\sqrt{3}}{2}\) or \(1:0.8660\) ratio. Below is a hexagon in Tinkercad with the default values.
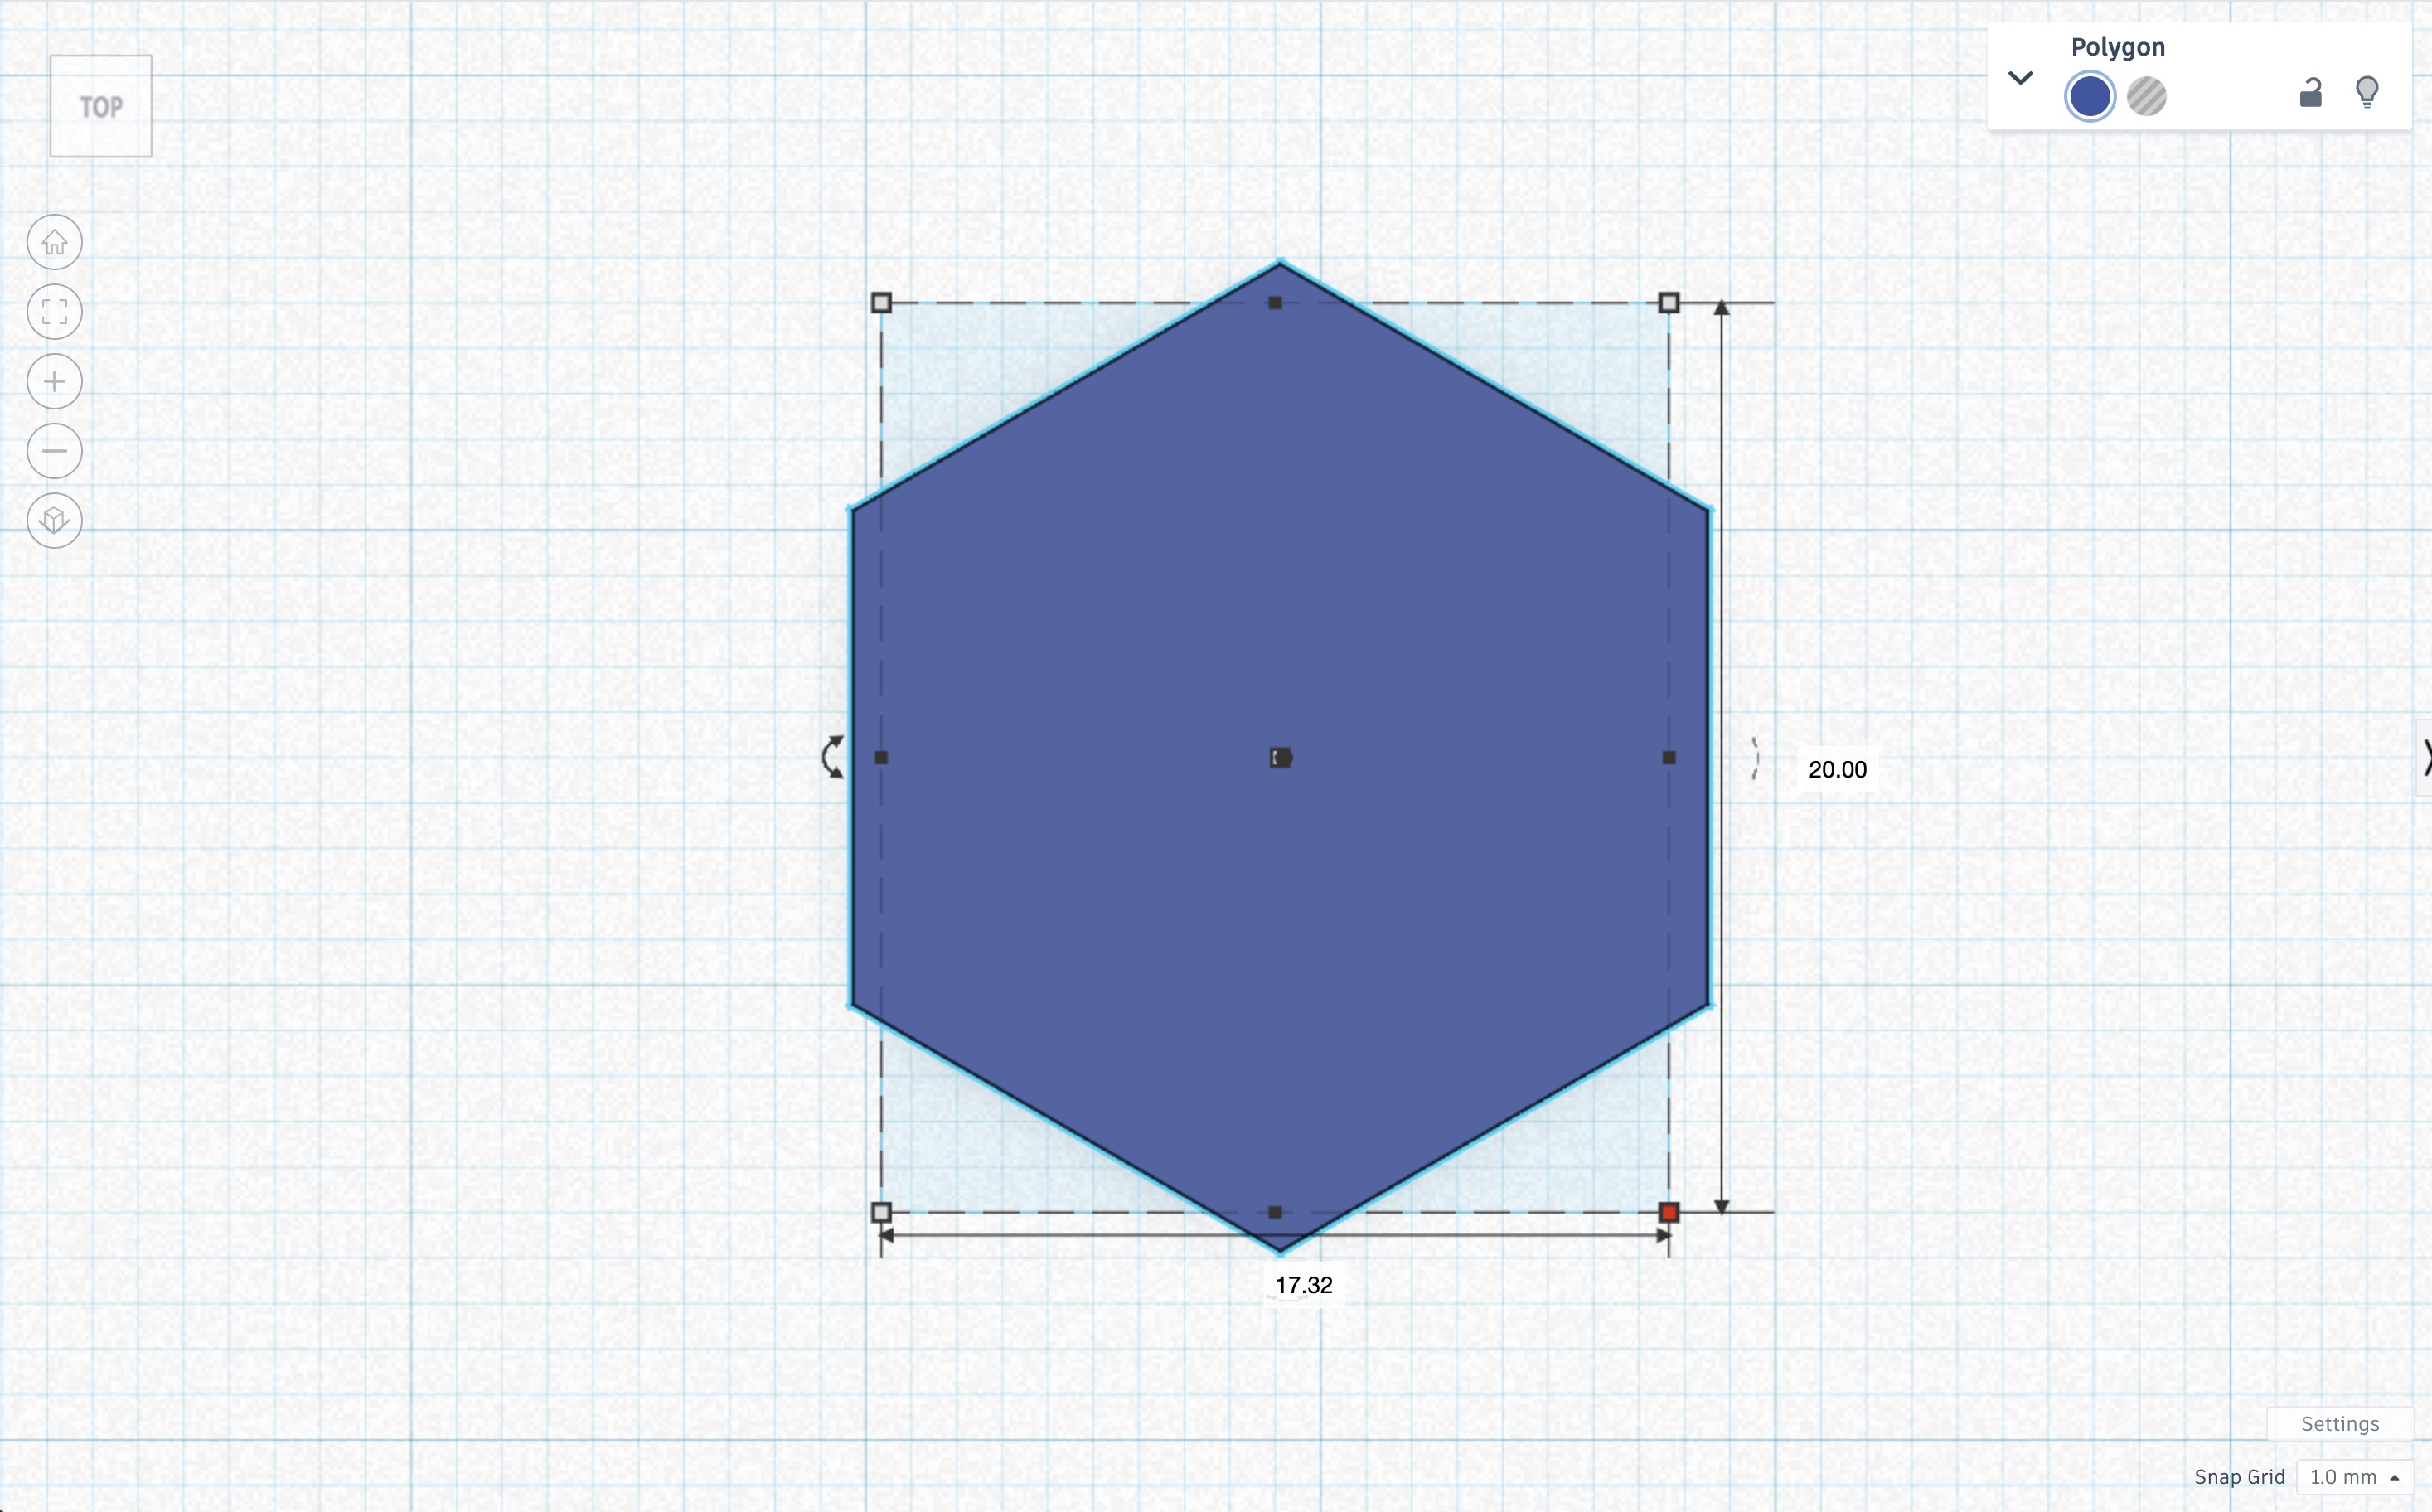
If the width was changed from \(17.32\) to \(20\) it is no longer a regular hexagon.
To make the irregular hexagon above to a regular hexagon, the height would be the width \(20\frac{2}{\sqrt{3}}\approx20\cdot1.1547\approx23.094\). Tinkercad only has decimals to the hundredth. Changing the height to 23.09 makes the hexagon closer to a regular hexagon.
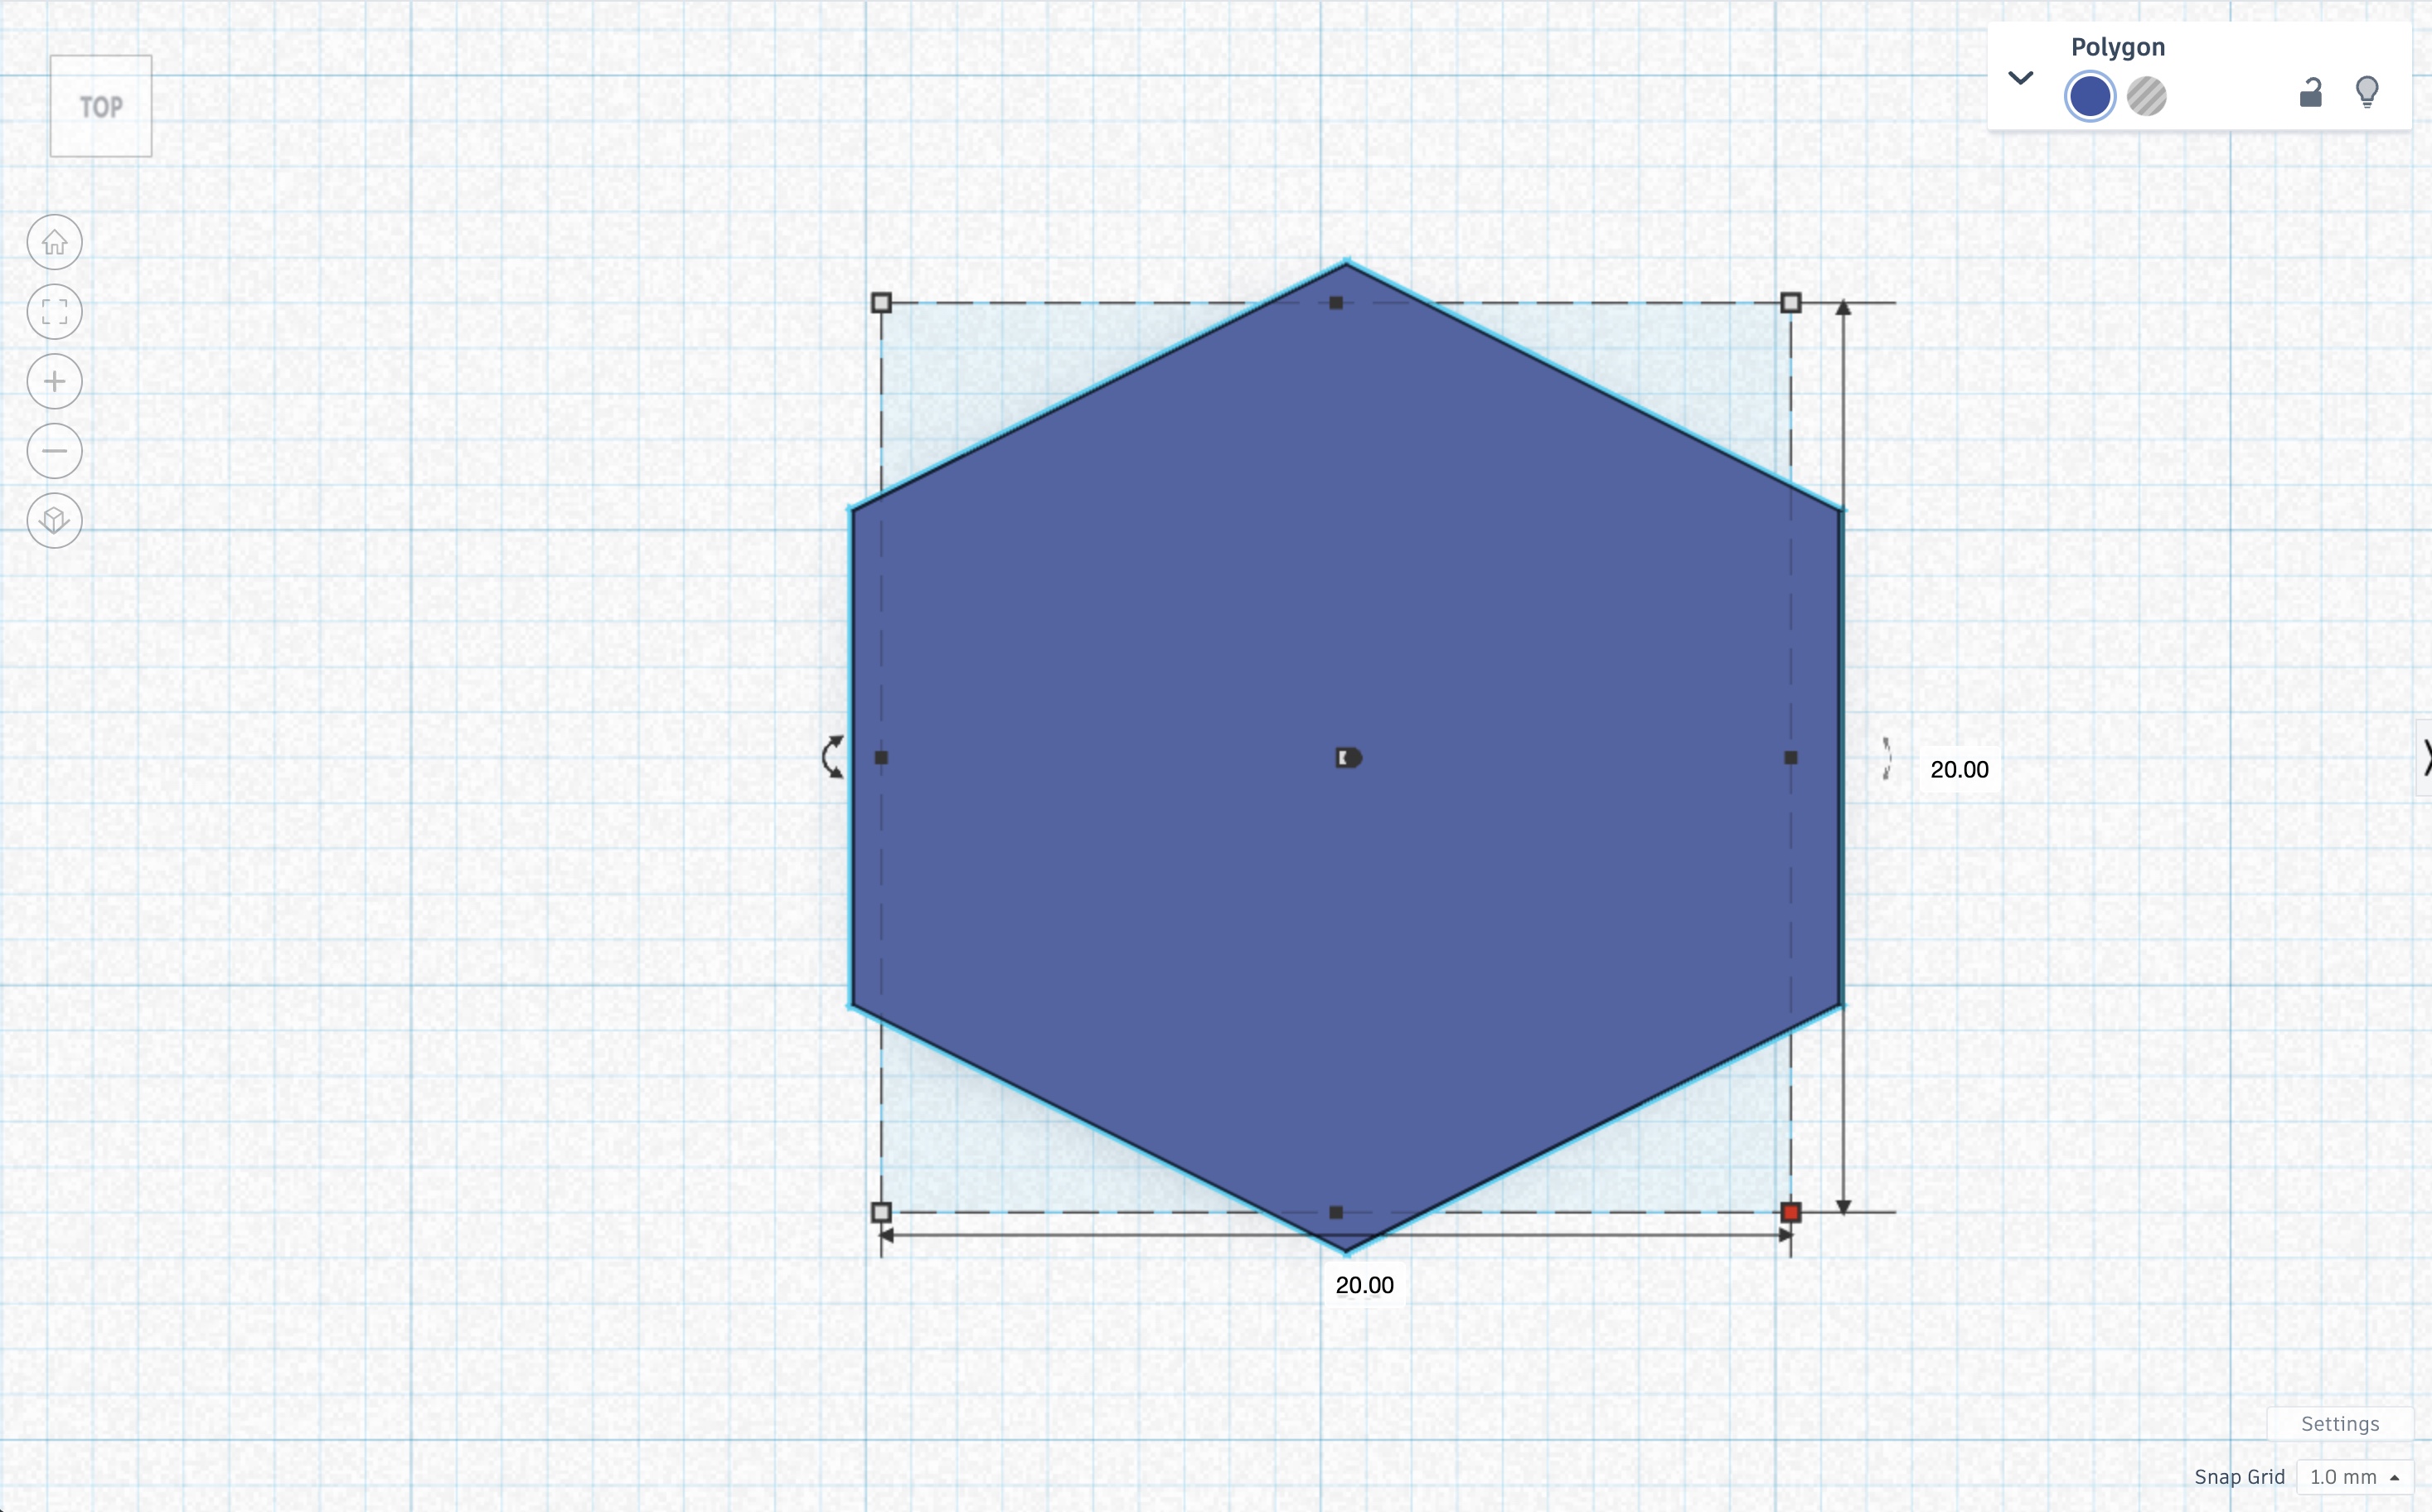
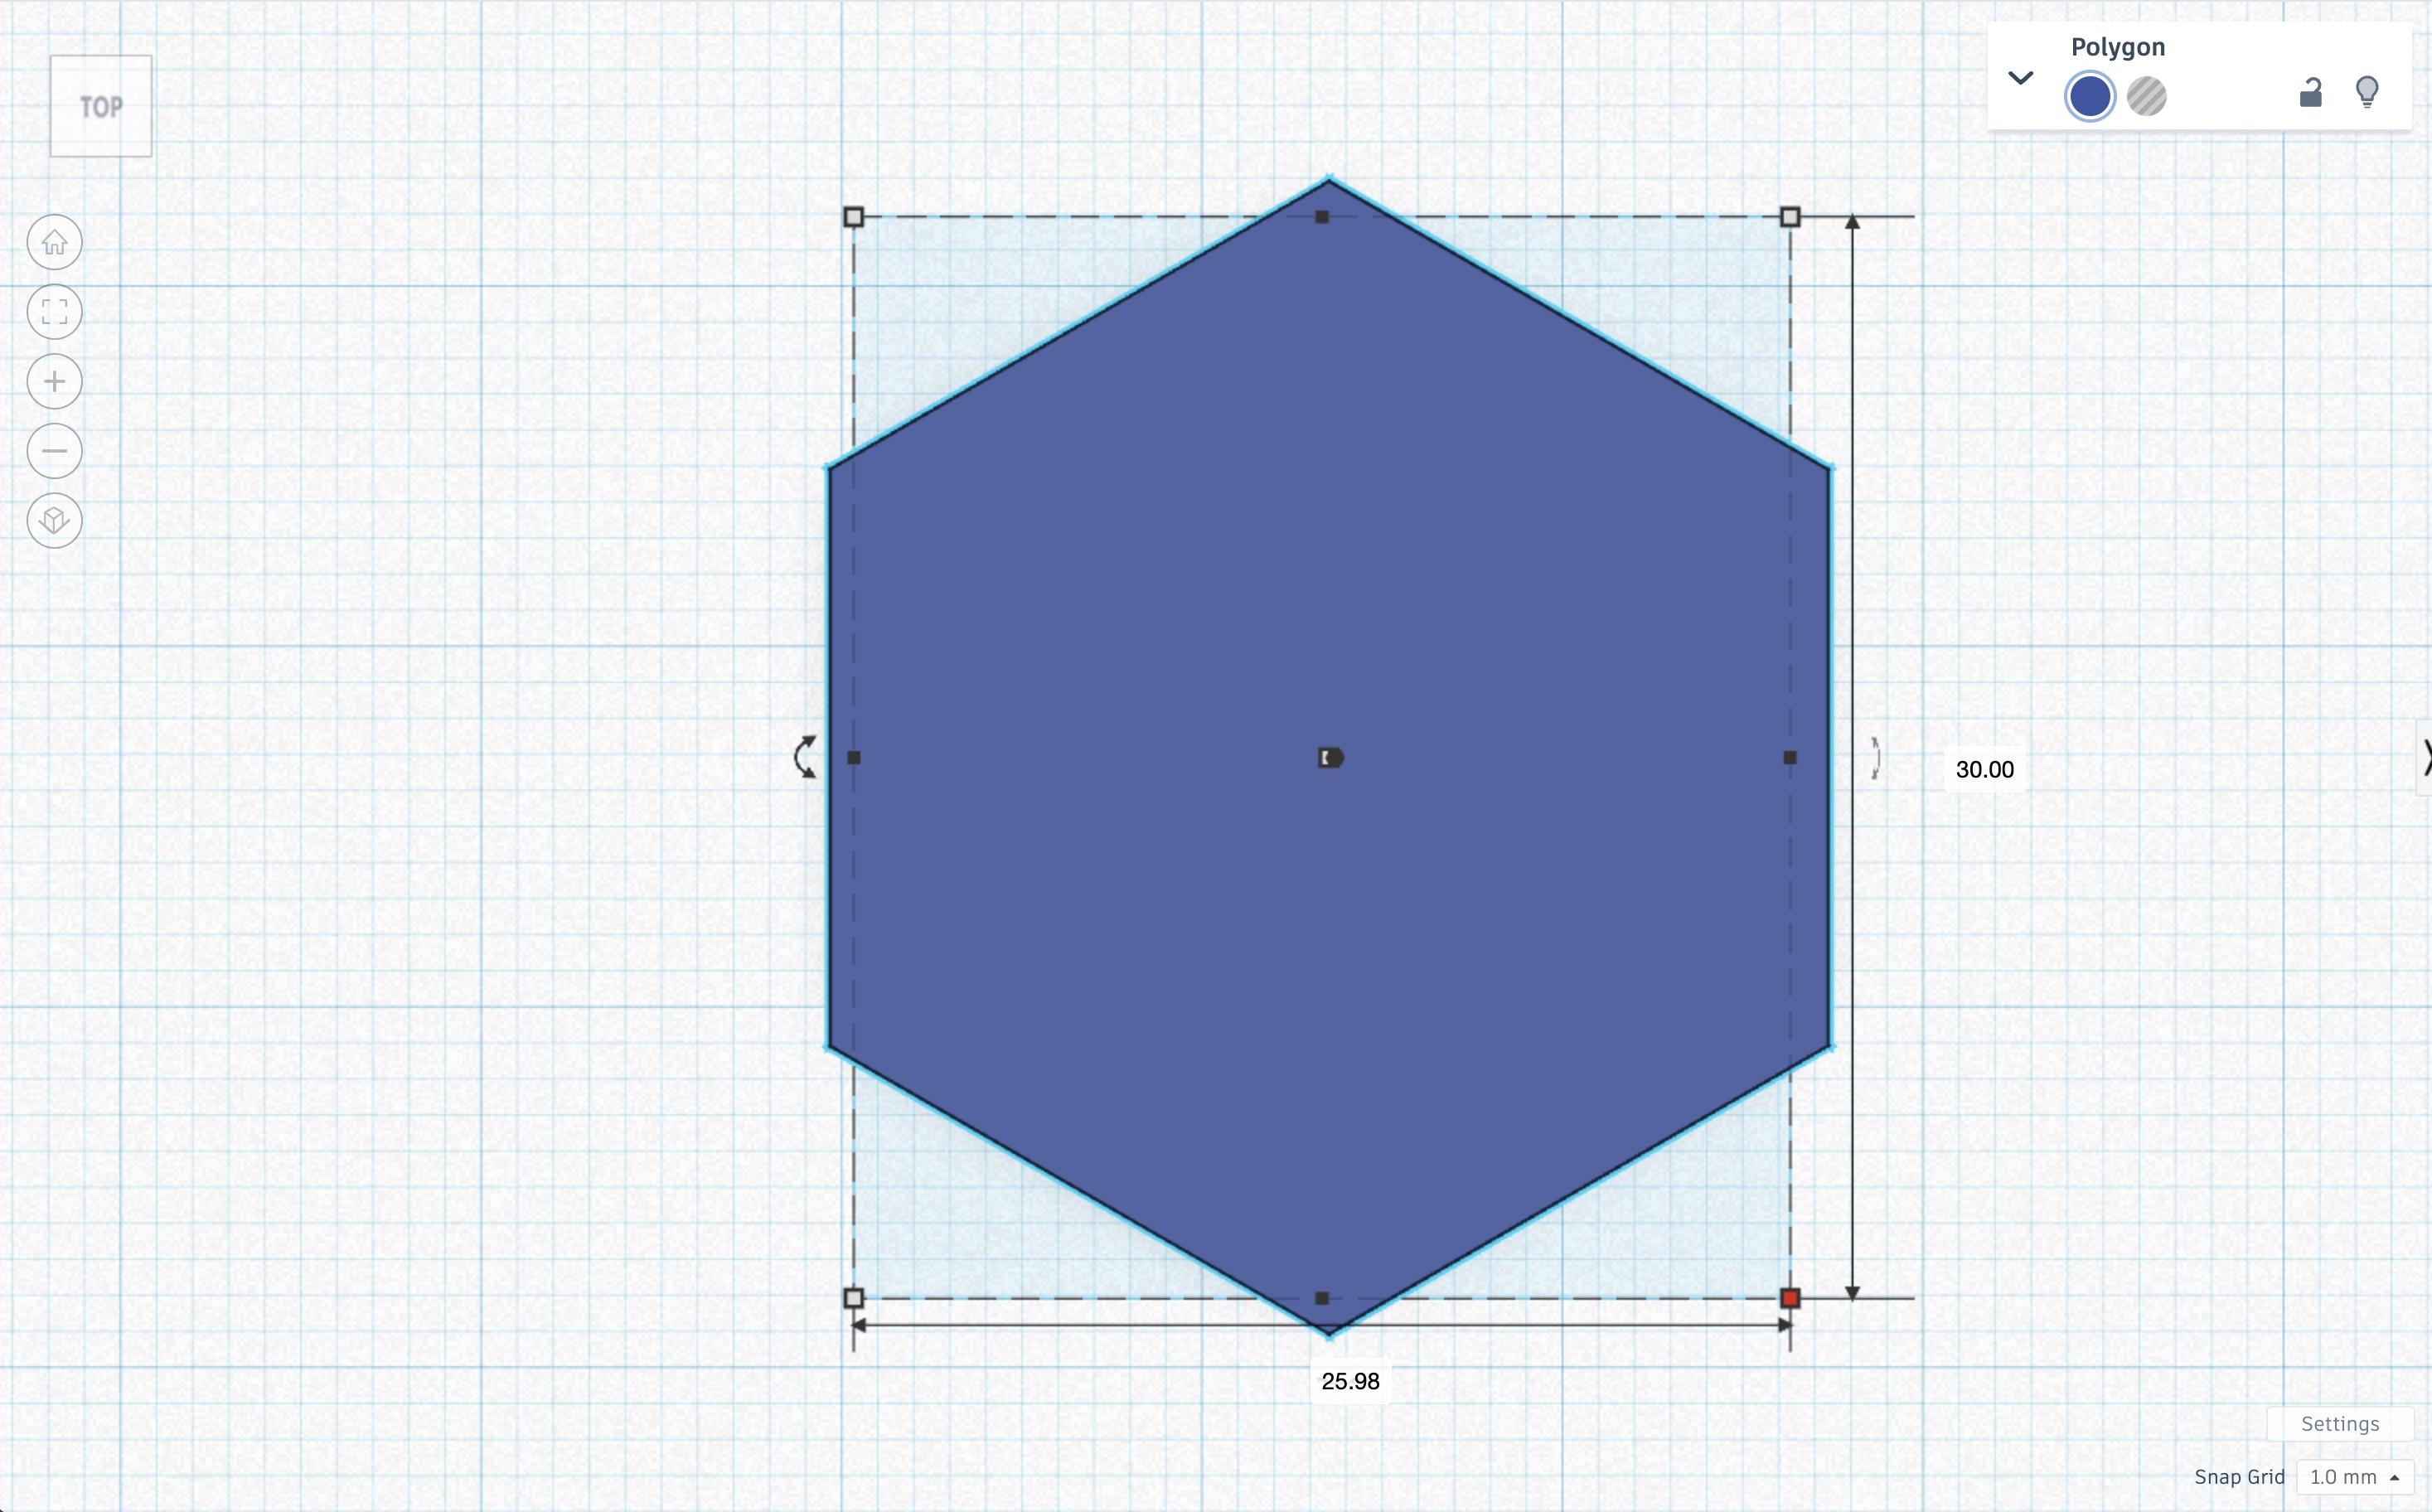
Similarly, the height of the hexagon below was changed to \(30\).
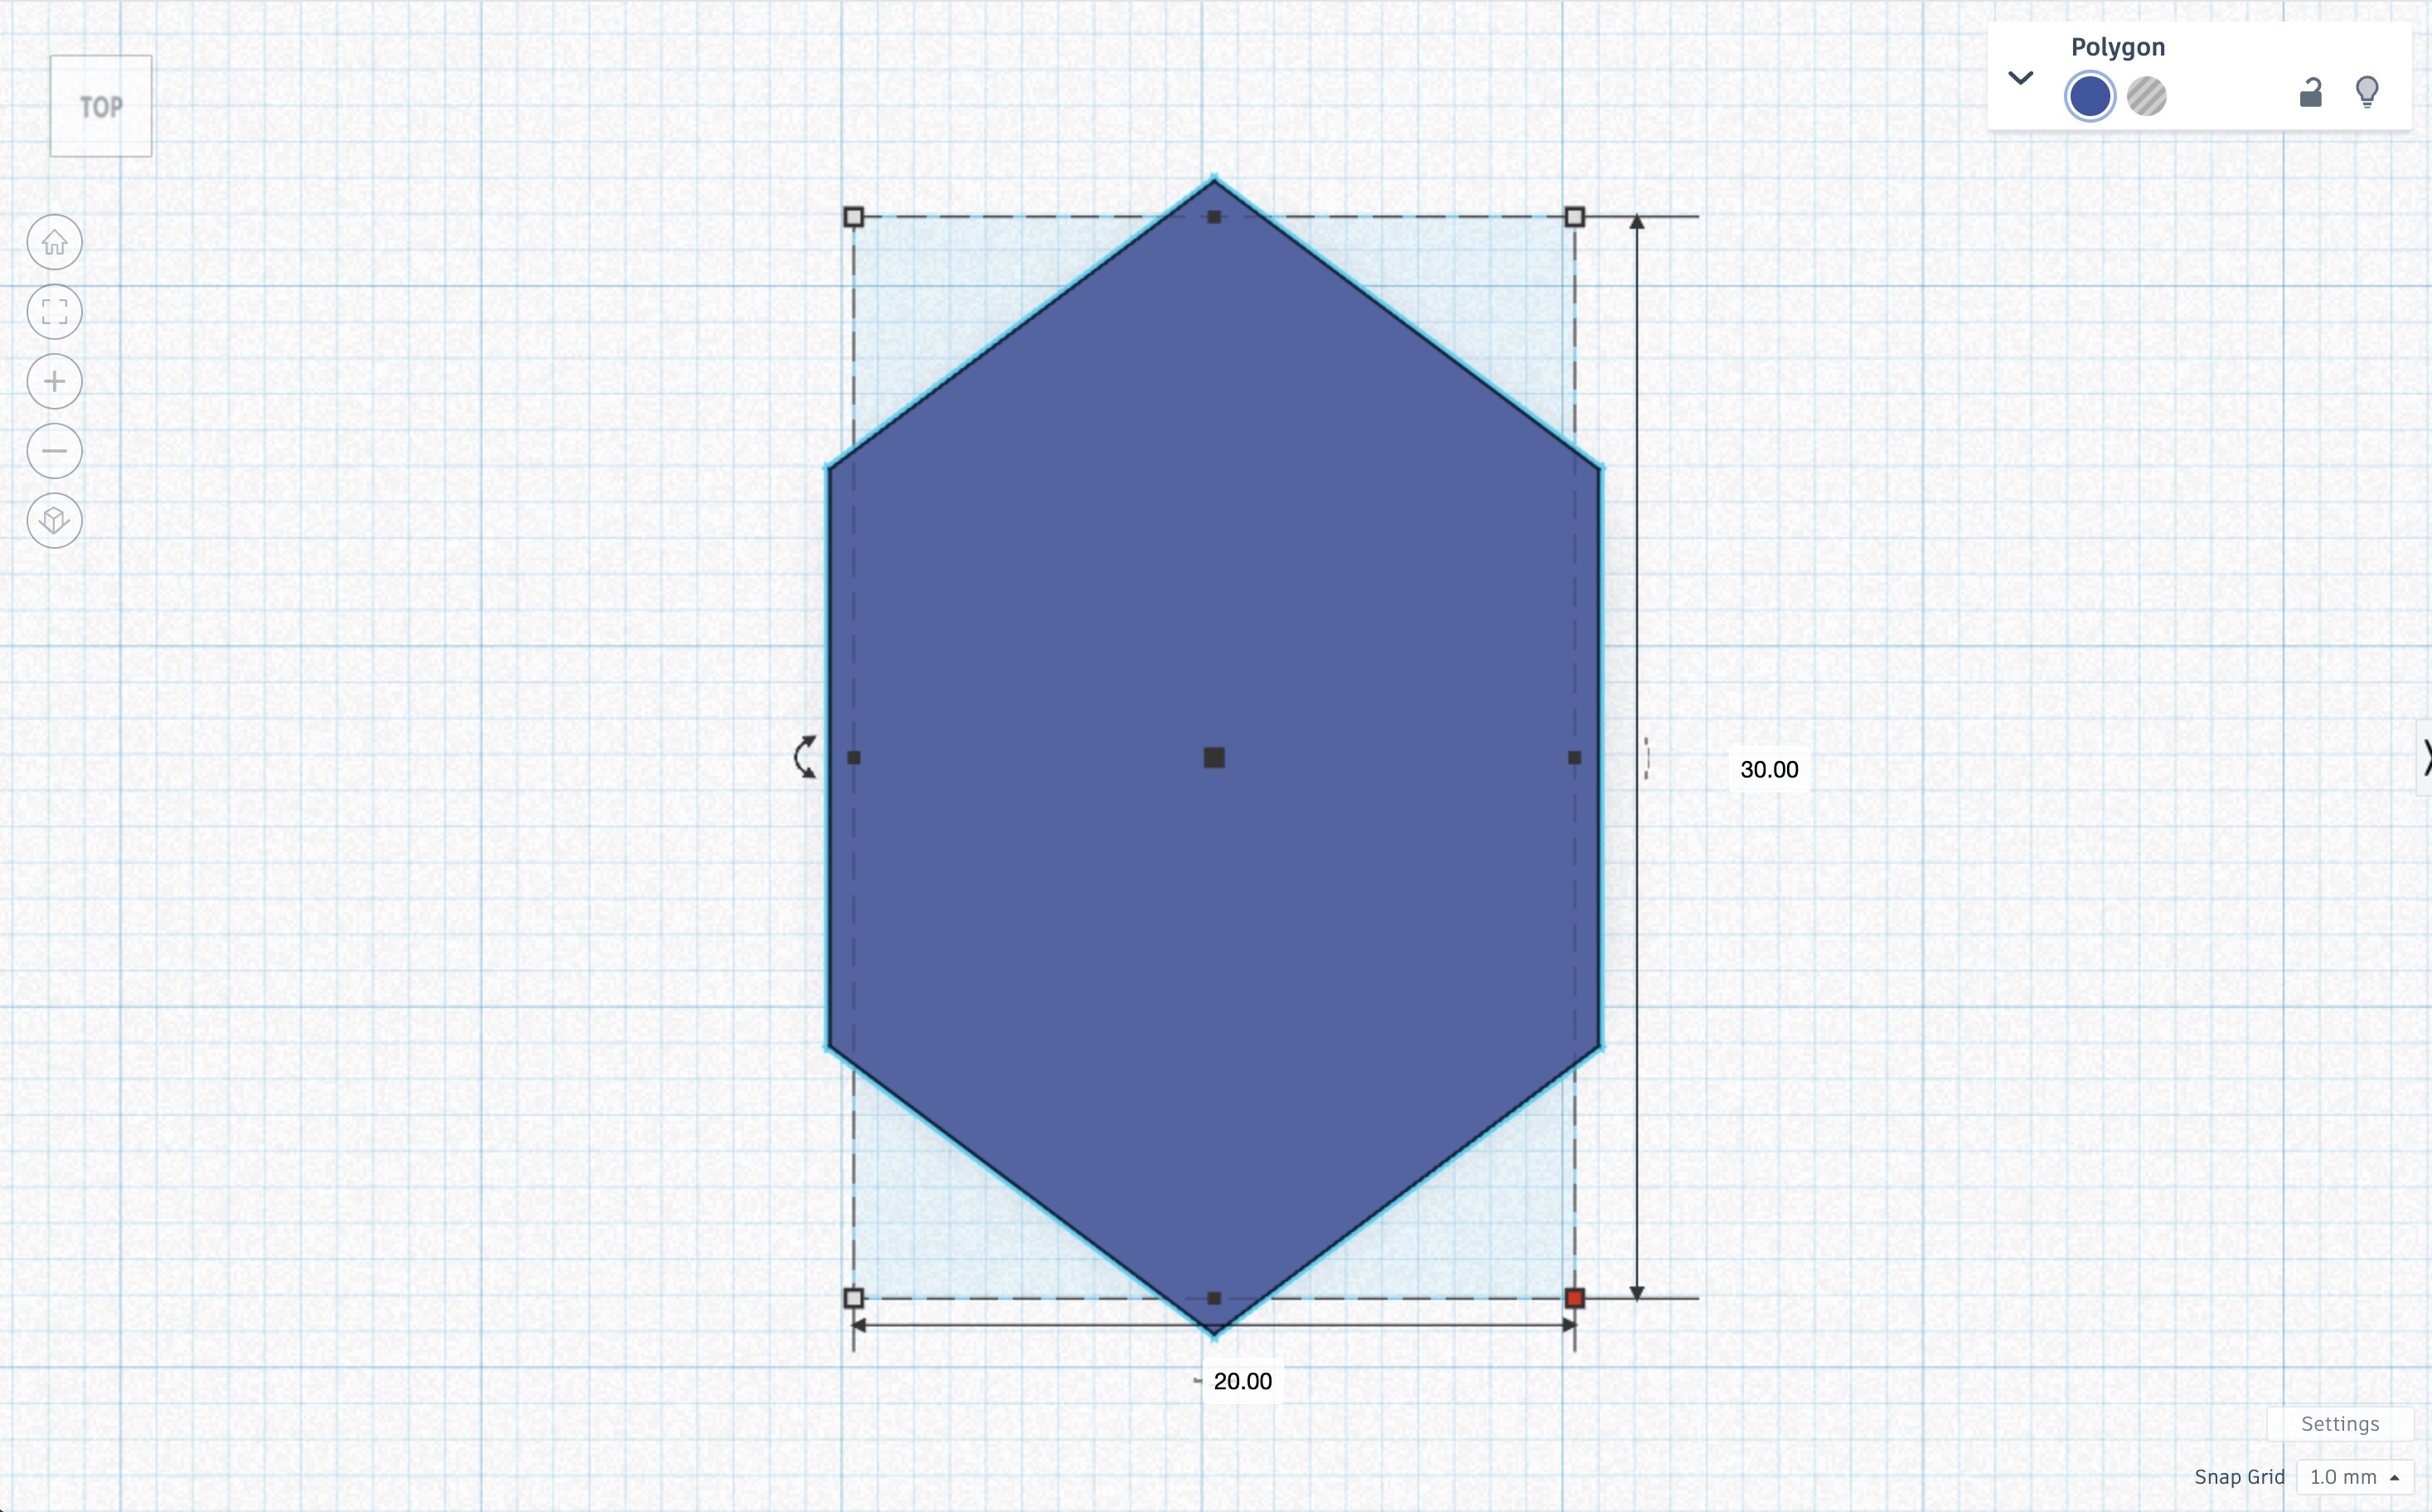
The width would be \(30\frac{\sqrt{3}}{2}\approx30\cdot0.866\approx25.98\).
As with the variety of M3 bolt heads, nuts other than hexagonal nuts can be used to modify this assignment for different learners.